
|
|
|
|
|
#1
 12-16-2011, 05:45 PM |
|||
|
|||
|
The can is held together by crimping of the ring. If you are careful you can open the crimp. Removing the old capacitor(s) is not trivial; it can be stubborn and might need to be heated to loosen. Or heating might anchor it even more securely. You may have to dig.
Once the innards have been removed, you can restuff any way you like and then put the crimp ring back on. The object, I guess, is to make the unit look original. You can even make the bottom of the chassis look original if you keep the old fiber wafer. Connecting to the aluminum case is tricky; you probably will have to solder to the crimp ring, which isn't aluminum. 
|
|
#3
12-16-2011, 10:11 PM
|
||||
|
||||
|
Quote:
Last edited by stusnyder; 03-14-2015 at 10:08 PM.
|
|
#4
12-16-2011, 11:50 PM
|
|||
|
|||
|
Thanks for the info!!
I did (finally) remove the one 4 section cap because it was in a recessed part of the chassis and I couldn't get a good angle on the saw, but I did do one other (and plan to do the rest) by cutting it off in place, right at the base and feeding thru the leads. It worked well! And looks good to me.. I didn't want to put all these big caps underneath and have to reroute wires, etc Now what does a dried up electrolytic look like? I mean one 4 section vertical cap guts came out real easy (no heat) and it felt dryish but it wasn't crumbling apart. The single filter cap in the power supply on the other hand was very moist and damp and took heat to get the guts pulled out. This is my first time ever trying this I just watched a bunch of youtube videos 
|
|
#6
12-17-2011, 12:03 AM
|
|||
|
|||
|
Quote:
|
|
#8
12-17-2011, 04:50 AM
|
||||
|
||||
|
Quote:
|
|
#10
12-17-2011, 04:37 PM
|
||||
|
||||
|
smellyyyyy!
Just make sure you do this outside.. Man.. it stinks! I usually put them in an empty Peanut butter bottle to keep the smell out of the house and I suppose a Zip lock bag would work.
Make sure your soldering iron is properly "tinned" good to conduct heat to the twist lugs through the solder wick. Just a couple tips for what it's worth. Good luck and Merry Christmas! What is that smell anyway.. WhooooF!  A-rack-a-rich! Buzz 
__________________
______________________ Buzzsaaw Sunlitedreams.com
|
| Audiokarma |
|
#11
12-17-2011, 01:36 PM
|
||||
|
||||
|
Quote:
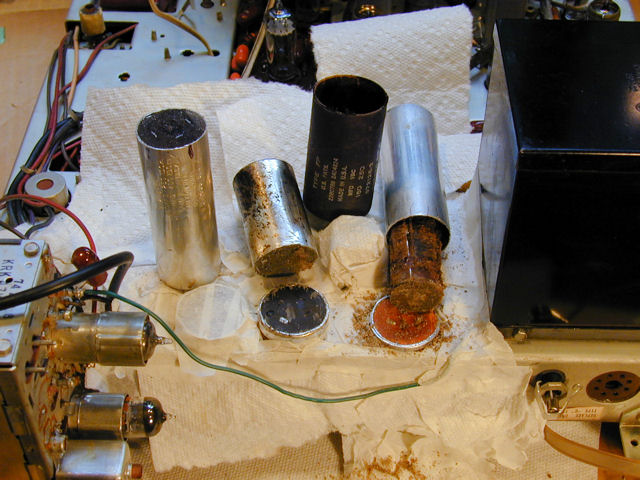 Appearance is not a reliable guide. The failure rate for old electrolytics -- even those that seem OK at first -- is very high, and the cost of new ones is low. They fail in much newer equipment, too. I recently repaired a 1984 TV that I had bought new. Three or four electrolytics had bulging tops and one had burned off its plastic insulation. My ESR tester found several more bad ones. If the electrolytics in 1980s TVs are failing, small wonder that 1950s electrolytics have turned to garbage. Phil Nelson
|
 |
| Thread Tools | |
| Display Modes | |
|
|


 Hybrid Mode

