
|
|
|
#31
 02-24-2011, 08:41 PM
|
|||
|
|||
|
tested 1 can all sections test fine, second can 1 of 4 tested tested fine, did not get to the others, but I suspect they will be fine as well, 3rd can tested 1 of 4 tested fine. will check the others later but I suspect they will be fine as well.
checked the .001 2kv plate to ground cap on the Vert out tube. its one of those hard white shelled caps. It tested correct for value, but the eye would only null to about 3/4 fully open. On leakage again it would not fully open, and that was at 450v. All I have is some 1.6kv dipped caps. My guess is they are prob better than the 2kv that were in there when they were new, but I will prob go ahead and order some anyway if I can find them. There is a .001 plate cap on the 6aq5 that is also a 2kv, argh... I have some 2kv .001 disc caps but the one in there are 10%. I dont think it would matter on the audio, but not sure about the plate to ground on the vert out. 
|
|
#32
02-25-2011, 09:08 PM
|
|||
|
|||
|
I added a micro sized fuse holder right by the horz out tube socket for the cathode of the HOT. I have a 300ma fuse in there. I also bypassed the fuse with a .1uf cap. With the cap in place it should be very easy to check the HOT current, just pop the fuse out and hook up the milliamp meter. I dont know if the cap will have any effect on the fuse, I know there is some voltage drop across it in operation, not enough to effect the HOT bias, but maybe the pulse could cause a false blowing of the fuse? fuse fatigue?
anyway I think I will now check to see where the takeoff for the B+ is on the pcb (its on the audio board) and see about putting in a line fuse there as well.
|
|
#33
02-25-2011, 10:27 PM
|
|||
|
|||
|
I went ahead and replaced that 2kv 001 with a disc cap, and pluged it all back in, still get a good raster, did not have time to hook up the tuner, so at least I did no harm to the HV with my HOT cathode fuse mod.
|
|
#35
02-26-2011, 06:39 PM
|
|||
|
|||
|
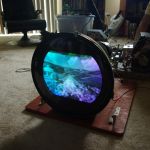
I wish I had my camera (AWOL) I cleaned up the knobs, reinstalled the chassis, hooked up the audio, did a brief center converge (OTA pics), set the gray scale up, after a few minutes it makes a very nice color pic, excellant flesh tones, deep colors, etc...
Sound is good as well (I had not tested that since I had to disconnect the speakers to get the tuner into the service position. the CRT is weak but does come up after a few. I am looking forward to pulling the cataract out to see how much nicer it will look. I am going to give it a rest and tackle the SS power amp, I only had one channel, not sure if it was the amp or the tuner. Have not tried the TT to see if it spins. I did a real quick rub down with some restrofinish, looks a lot better, not sure if its worth the effort to restore the wood work. I have not done much of that, I may choose a set that is not as cool looking to start off with my wood refinshing skills. I hope the phono cart is not DOA, they are hard to come by and pretty expensive considering what they are.
|
| Audiokarma |
|
#36
02-26-2011, 07:10 PM
|
||||
|
||||
|
Quote:
 (well, I was there on vacation and took advantage of it... but that explanation doesn't sound anywhere near as impressive...) (well, I was there on vacation and took advantage of it... but that explanation doesn't sound anywhere near as impressive...)Good luck with the resto- I love reading about other people's repair stories.
|
|
#37
02-26-2011, 09:38 PM
|
|||
|
|||
|
well the SS amp was in pretty good shape, used compressed air to blow off the 45 years of dust, yuck...
it had two .0027 paper caps on the input, both leaky, hope they did not fry the transistors. Two small 10uf coupling caps were leaky and had a high ESR, replaced those, there was one 40uf 250v cap that was a bit leaky as well, and a single 500uf 50v cap (think it was a bypass cap for the power transistorss) was leaky. the rest were ok (a couple 500uf 50v on the output and a triple section 250v filter cap for the tube stereo power supply). anyway will try it out tomorrow, at least can test it by touching the tape input and see if both channels work. the tube stereo will def need some work, there were paper caps in the MPX board, so at the very least those will have to go. The AM was working but the FM was dead. Did not check anything at all on that, so maybe just a dead osc tube in the FM tuner.
|
|
#38
02-26-2011, 10:28 PM
|
|||
|
|||
|
well of course there was no way I waiting until tomorrow. guess one of the leaking B+ caps may have been the prob with the FM, as it was working fine now and both channels sound nice and clean. the MPX light is working but I did not try to see if there was actual separation in the channels. I wil pull the radio chassis tomorrow and replace those caps and give it a general going over. The face plate is VERY dirty, so I will clean it up when I pull the stereo. I can see some of the silver paint is warn, not sure how to fix that, but maybe on of those paint marker pens may do the trick.
this thing really bumps....
|
|
#39
02-27-2011, 12:30 AM
|
|||
|
|||
|
well about out of gas, replaced the two papers (leaky of course, just checked for the heck of it) and 3 eletrolytics, all tested with high esr, could not check two of them for leakage, too low a voltage, like 5 and 15v my tester only goes as low as 25v, but they needed to go anyway.
Cleaned and oiled all the moving parts, scrapped of some mild rust spots that were on the metal face where the dial pointer slides, a little lithum there just to smooth it out, oiled all the pulleys etc... cleaned the pots and switches. cleaned the white plastic back part of the dial face that obscures the chassis when reading the channels. the chassis was very clean. I just find it hard to understand the usage of those dumb paper caps, I figured they were stopped by the late 50's
|
|
#40
02-27-2011, 09:30 AM
|
|||
|
|||
|
more progress today, the stereo tuner faceplate cleaned up very nicely as did the knobs, hot soapy water and an old toothbrush did the trick.
on the plastic there is lettering that stands proud of the backing, RCA, new vista etc... was silver but much of it was worn off. I think If I can find or fabricate a small rubber J roller with the roller made from fairly hard rubber, I could just use it like inking lettering with some silver paint. I dont trust my hands to try and touch up with a brush, and since the lettering stands proud, I am pretty sure it would turn out nice. Going to clean out the bottom of the cabinet under the tuner today and reinstall, hopefully the stereo will not need any more work as its a bit of a PITA to hook it up to the amp and speakers. Pretty sure it will be fine. I have worked on other RCA tube tuners, they work very well.
|
| Audiokarma |
|
#41
02-27-2011, 05:18 PM
|
|||
|
|||
|
Cart is good will have to get a new needle. TT operates normally, just dirty as heck, but seems to be coming clean with no corrosion. removed platter bearing, will repack. normal stuff lube everything that moves. This one is going to be a record turnaround time from pickup to ready to use. Easy to become my favorite due to the ultra cool styling.
|
|
#42
02-27-2011, 06:57 PM
|
|||
|
|||
|
all back together, Its missing the blue lateral adj, I am going to look around and see if I have a spare, the bracket is there, but the screw adj is MIA.
The TT works smoothly but I will have to do a re-tread on the idler wheel, its not gripping well enough to cycle thru the tone arm sequence, I am pretty sure its just slipping, the rubber was not very pliable. the free floatiing cart holder needs a new felt (it actually rides on the record). the TV switch turns off the amp when the TV is one. I can defeat this by just pluging in the amp directly into the power line, bypassing the TV chassis socket. that way I can use the aux input (tape) for the DTV box, but I will still have to disable the speaker cut out that disconnects the speaker when the TV is on. I really prefer using the stereo to drive the TV audio, I dont know why zenith and RCA did it this way, magnavox was better in that they used the stereo amp for TV (mono of course but still...) I will do it in such a way as to be easy to reverse.
|
|
#43
02-27-2011, 07:36 PM
|
||||
|
||||
|
Quote:
|
|
#44
02-27-2011, 07:38 PM
|
||||
|
||||
|
If that doesn't work, maybe you can flip it around? I used to charge $10 for that service back when I was still repairing VCR's on a daily basis, it was pure profit.
__________________
Evolution... 
|
 |
| Thread Tools | |
| Display Modes | |
|
|


 Linear Mode

