
|
|
|
#61
 01-08-2010, 04:28 PM
|
|||
|
|||
|
Quote:


|
|
#62
01-08-2010, 05:48 PM
|
||||
|
||||
|
Quote:
The guy I got my Philco 15DX from found some old worlds fair souvenir spoons and a scrapbook of old cigar labels tucked inside. Last edited by bandersen; 01-08-2010 at 06:01 PM.
|
|
#63
01-09-2010, 12:32 AM
|
||||
|
||||
|
Quote:
|
|
#64
01-09-2010, 12:35 AM
|
||||
|
||||
|
Quote:
|
|
#65
01-09-2010, 04:37 AM
|
|||
|
|||
|
Quote:
From time to time there are appearances of other vintage electronics. Like the odd clock radio or old suitcase style record player.
|
| Audiokarma |
|
#66
01-15-2010, 07:16 PM
|
||||
|
||||
|
I decided to use some sweet Cornell Dubilier non-polarized polypropylene caps instead of electrolytics. I think it's a little more authentic this way.
|
|
#67
01-16-2010, 01:01 AM
|
||||
|
||||
|
That's exactly what I did with my Majestic 71. Not only is it more authentic, they'll outlive us all. I didn't want to risk having to open mine again in the future because of a failed electrolytic. Especially since I had to fabricate a new can.
John
|
|
#68
01-18-2010, 09:41 PM
|
|||
|
|||
|
Bandersen -
I'm so thankful for this thread. A couple days after you found your WR-8, I found a WR-8-R, and I've found your thread to be such a help as I've gone through a similar restoration process. It was a huge help to see how you tackled the caps, etc. PLEASE keep posting pics and explanations of what you found worked. I'm especially interested to see how you're going to handle the rest of the caps. There's at least one that's in a box with a choke coil, I believe. Anyway, thanks again, and please keep posting your progress! Zach
|
|
#69
01-18-2010, 10:39 PM
|
||||
|
||||
|
Quote:
Hi Zach, glad you're enjoying my posts and don't worry - I'll keep them coming. I've just been sidetracked with restoring a couple TVs. I get distracted pretty easily by shiny new toys Here's are some pics to tide you over until I get back to working on it in a week or two. Here's the toner lacquer I'm going to use. Dark Walnut on the body and Golden Oak on the center board. 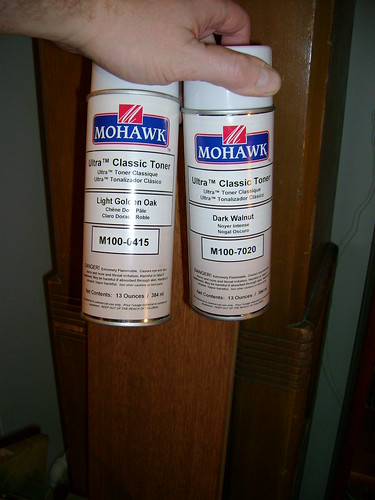 I also picked up some Leather Brown for the power chassis.  Finally, here are those boxes you asked about. I do plan on popping them open and restuffing. The larger has a 1.0, 0.5 0.1 and 0.1 MFD cap inside. My replacement polypropylene should fit with room to spare.  However, the smaller cap just takes a single 1.0 MFD and I don't think my new one will fit  I might need one that's a little "flatter". 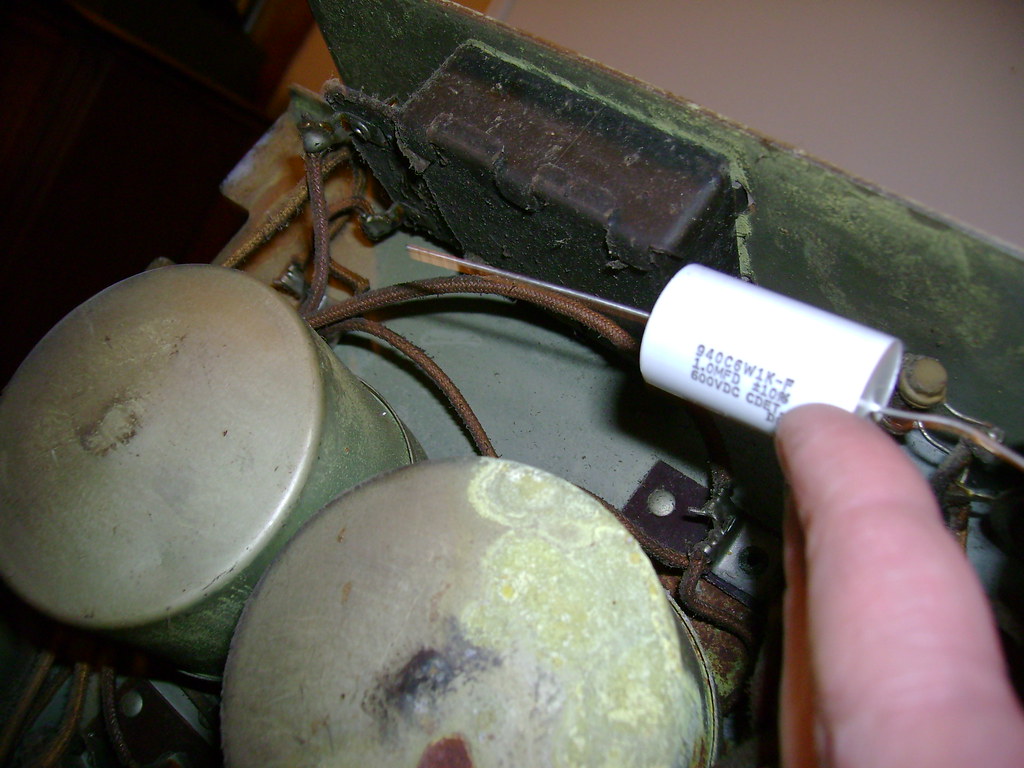 I don't think there's a choke coil in either box though. Here's the schematic I'm working from. http://www.nostalgiaair.org/PagesByM...3/M0040343.pdf I really love that old style wiring diagram. It's so easy to trace the wiring! Last edited by bandersen; 01-19-2010 at 02:30 AM.
|
|
#71
01-19-2010, 02:07 AM
|
||||
|
||||
|
Quote:

|
|
#72
01-24-2010, 04:06 PM
|
||||
|
||||
|
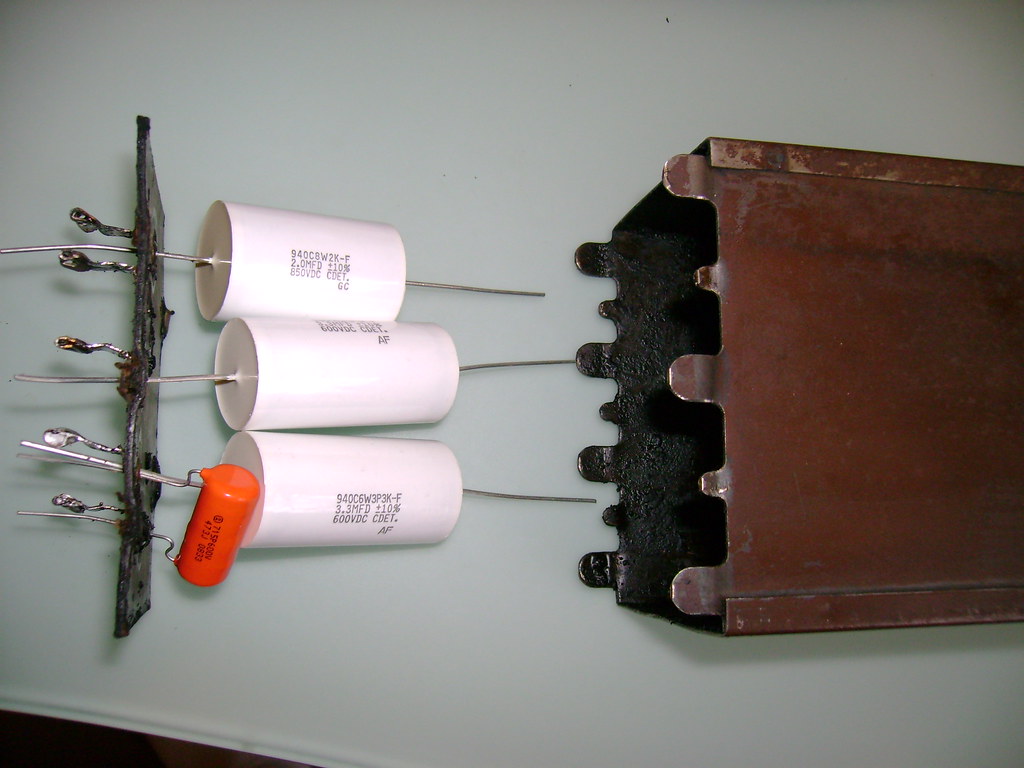
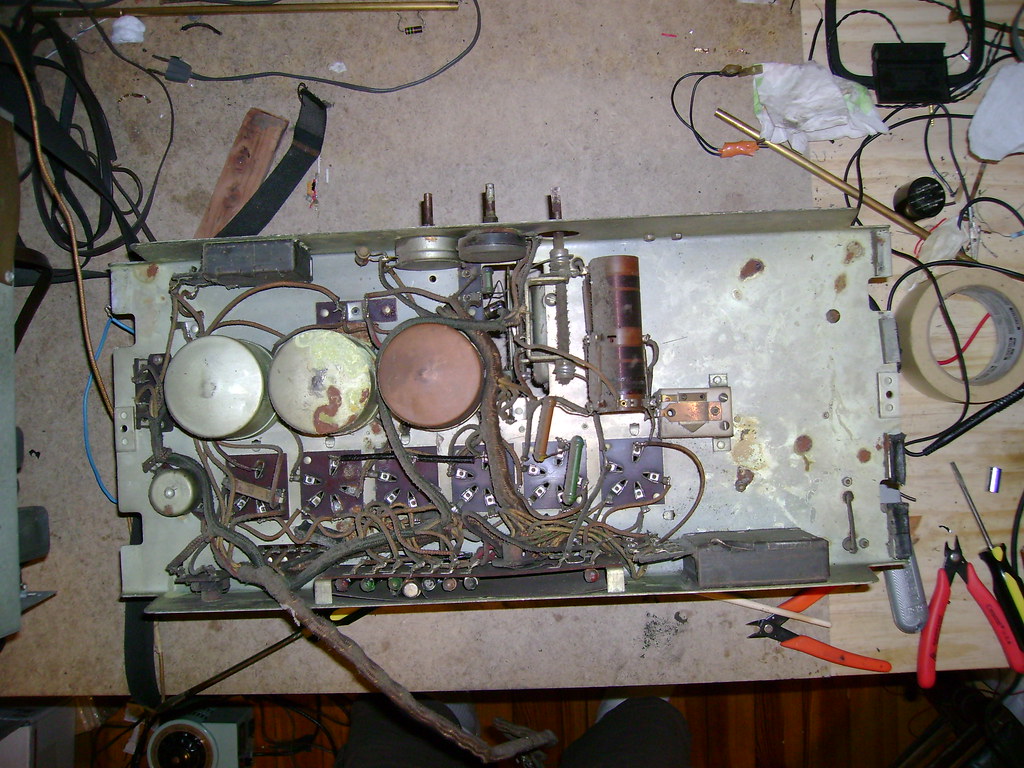
I'm back to working on the radio this weekend. Here's the underside of the receiver chassis. It's a real PITA to get at the capacitors and resistors.
  First up, I tackled the 5-section capacitor block. 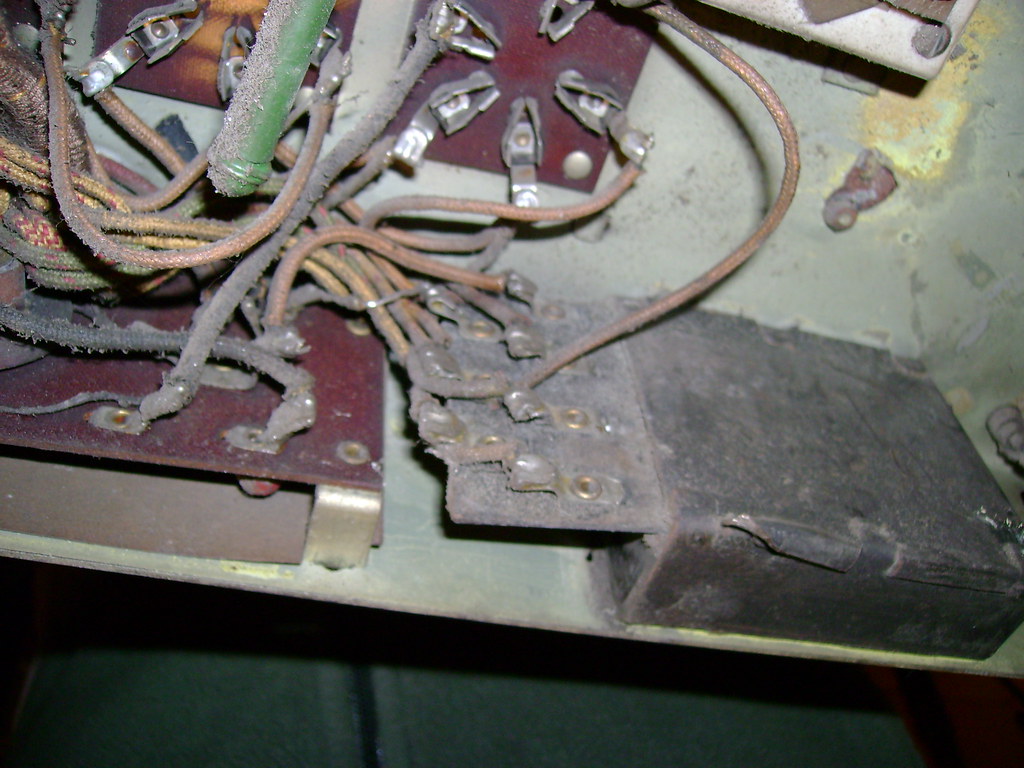 I discovered that a small chisel is the easy way to pry those heavy steel tabs up without leaving much of a mark. 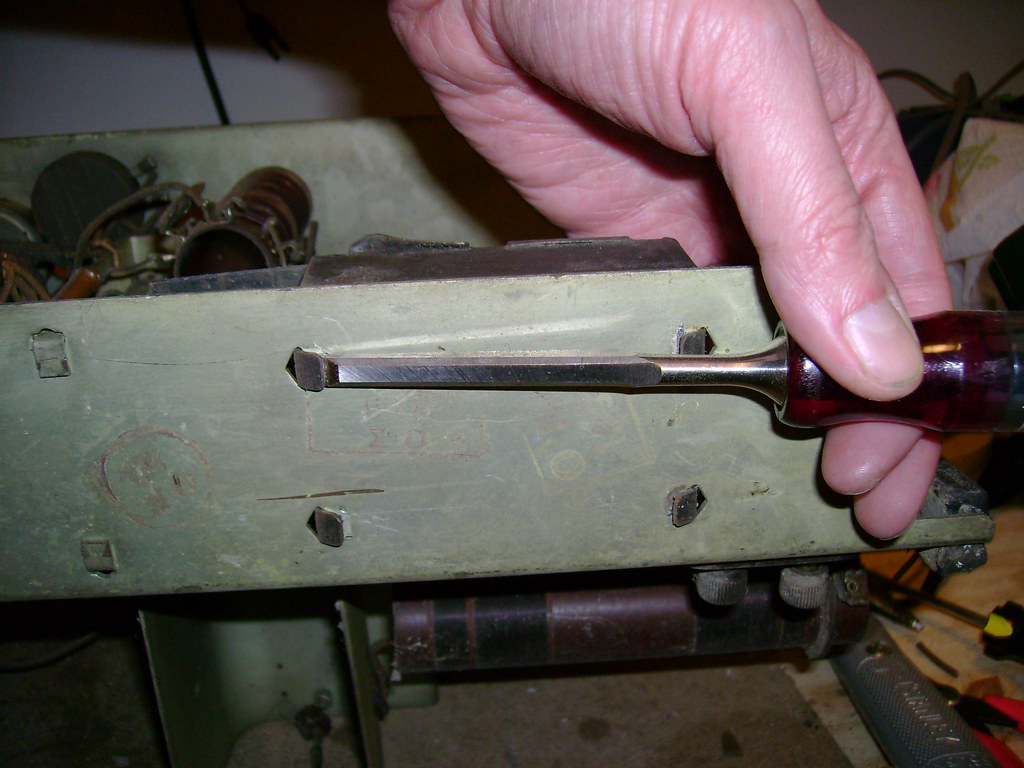  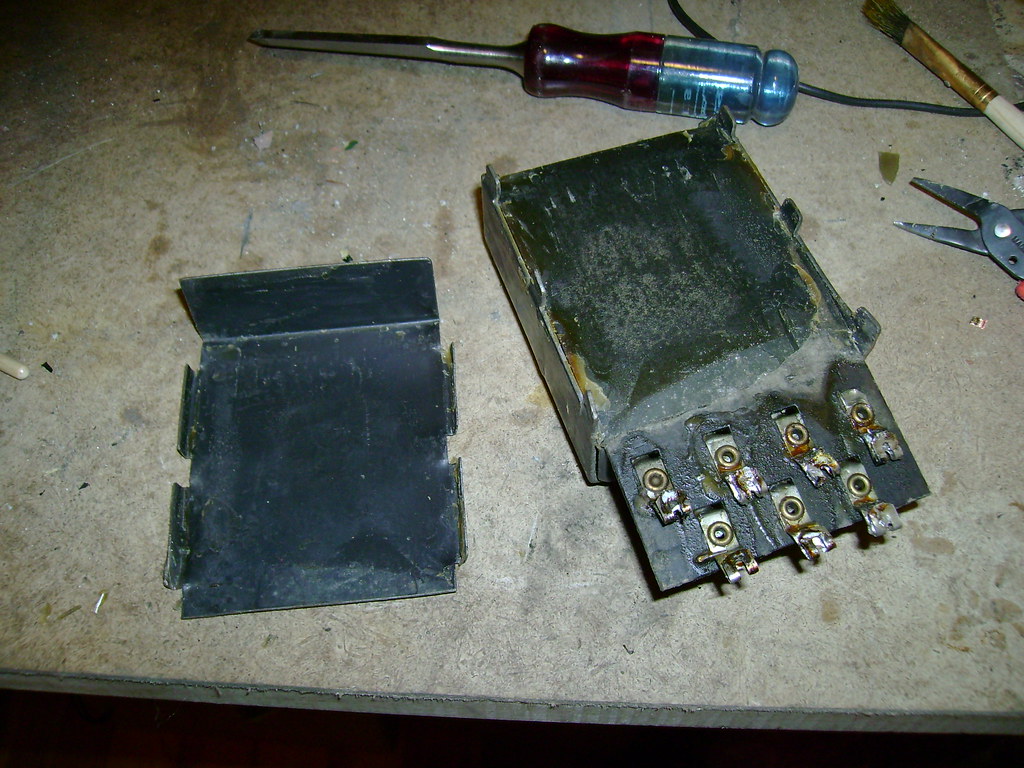 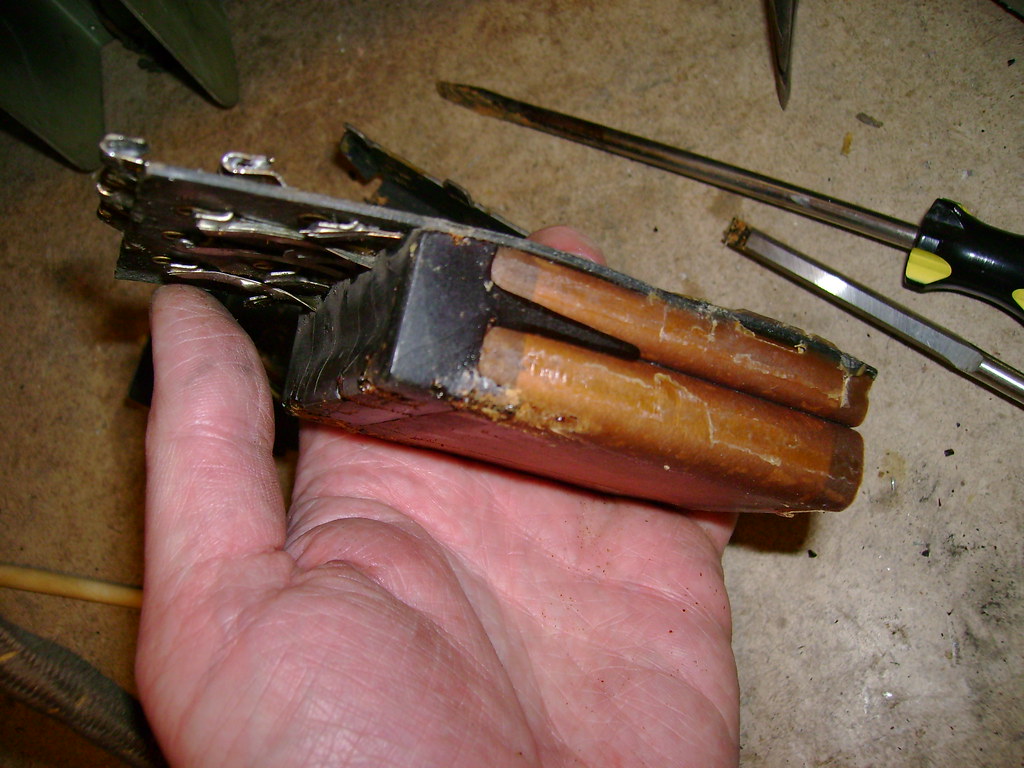 I melted out the tar to free up the old caps and expose the metal contacts. 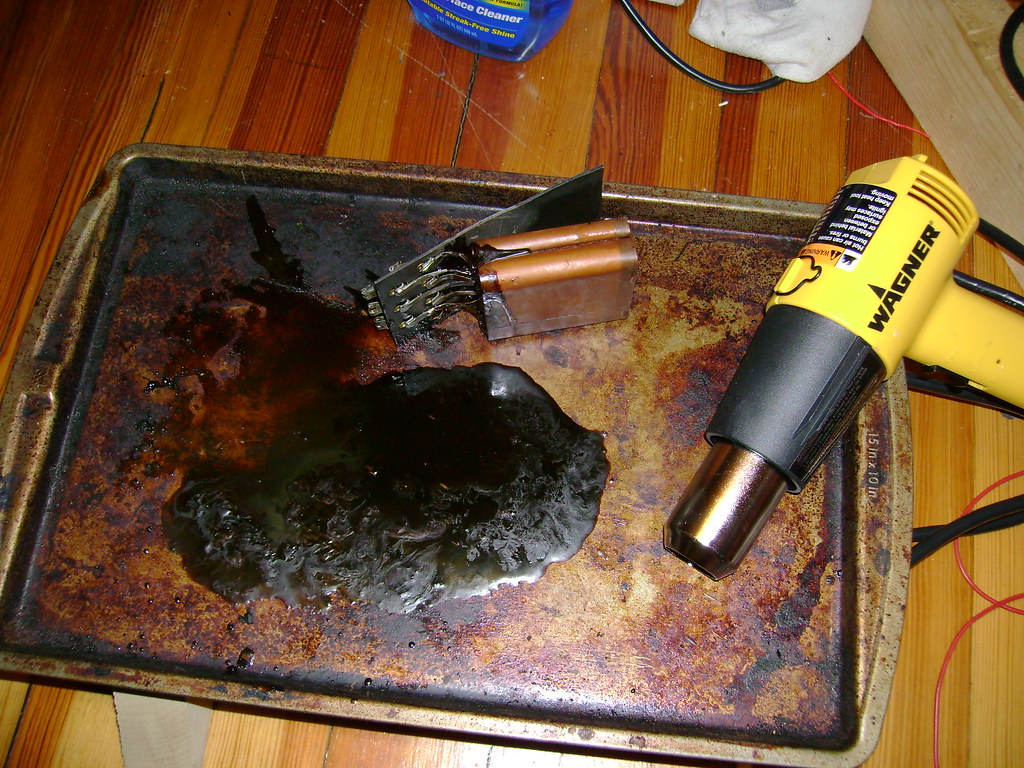 I cleaned up all the parts with lacquer thinner. 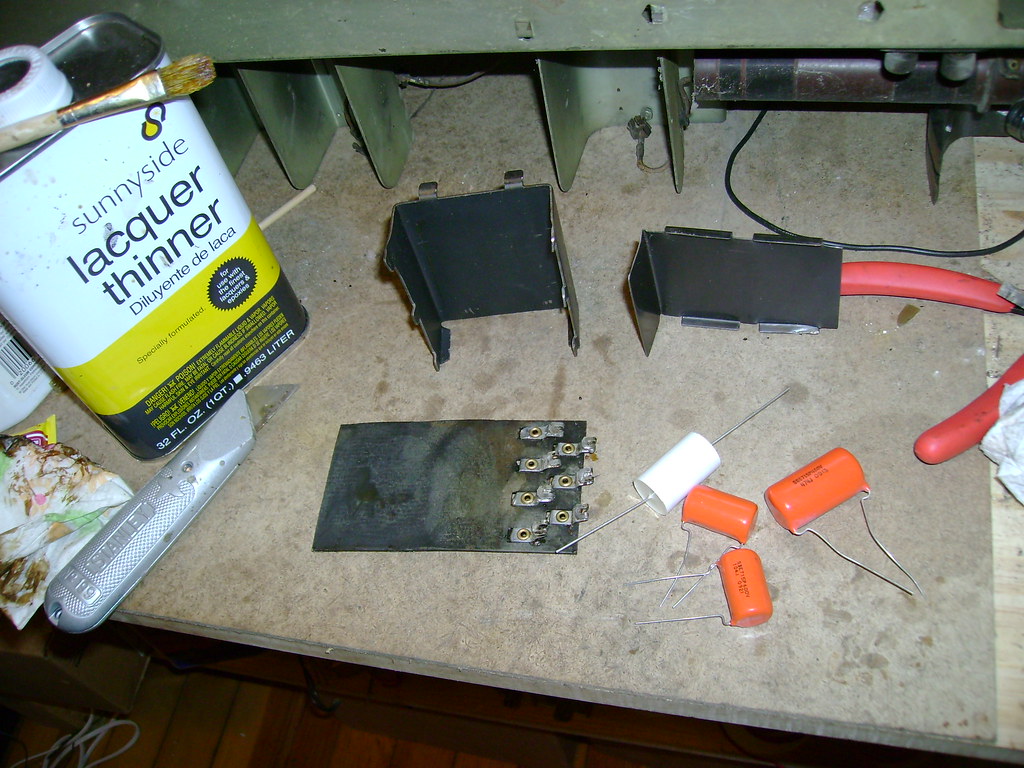 Here are the new caps wired in. I'll be used some two-part epoxy to glue them down the the backing board. 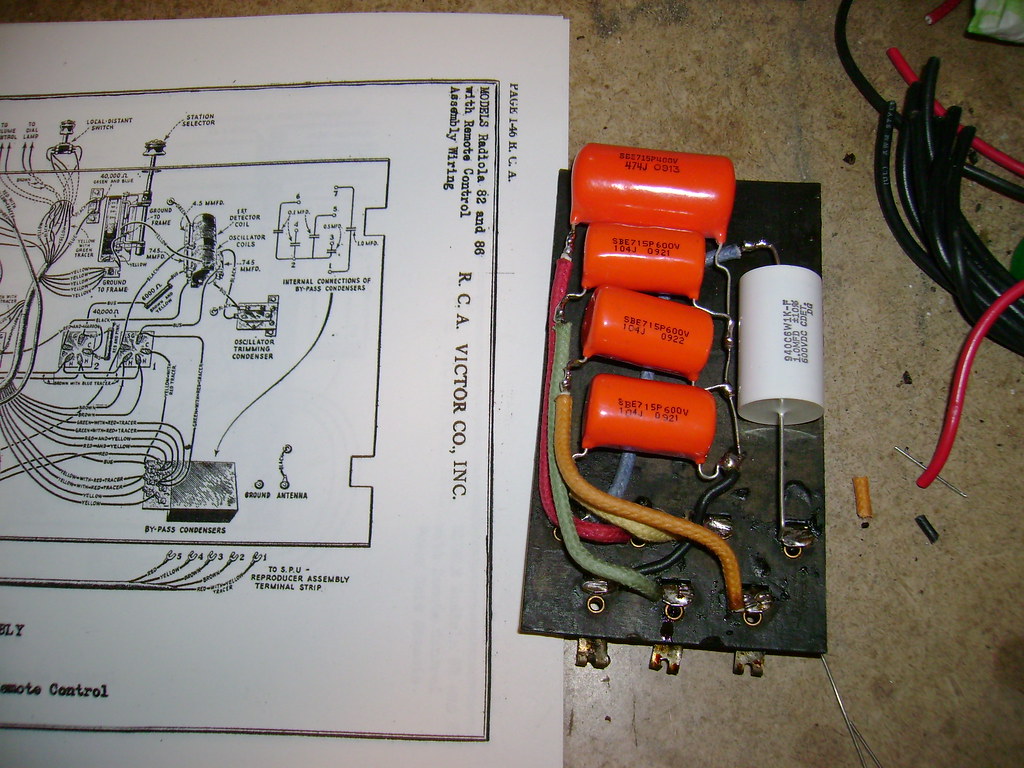 Here's a dry fit of it all back together. I think I'll just stuff a little packing material inside rather than filling it with a potting compound. Never know if I might need to get back in there  I'll also be painting it flat black. 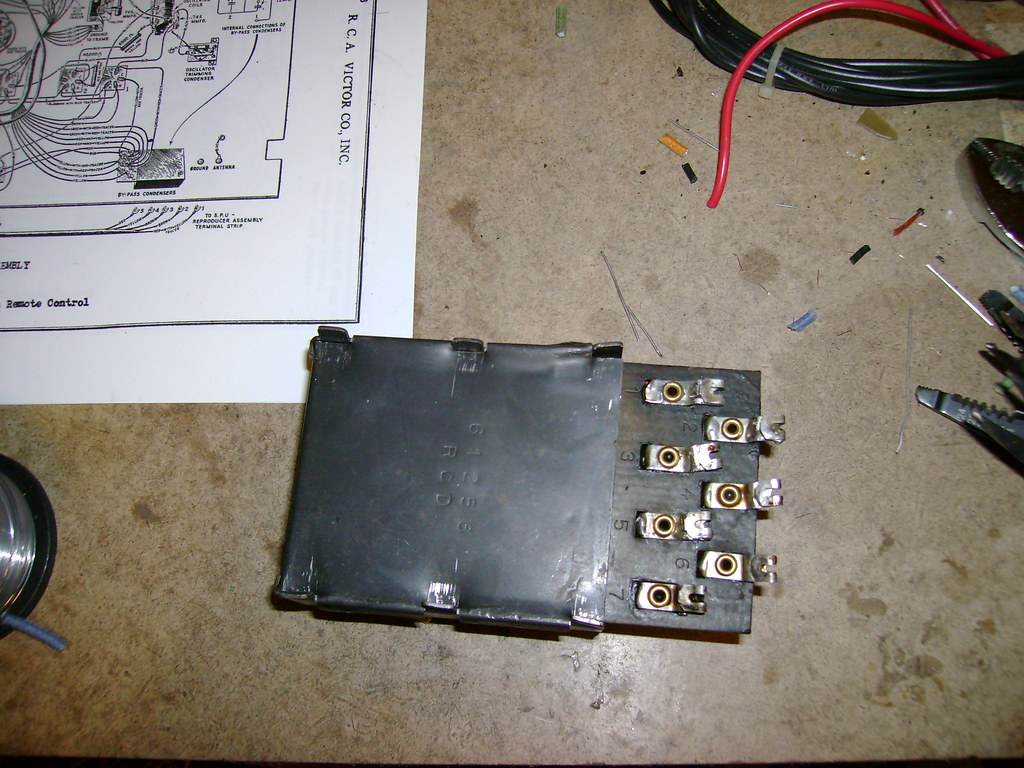
|
|
#73
01-24-2010, 04:17 PM
|
||||
|
||||
|
Next, I took a closer look at that nasty IF can.
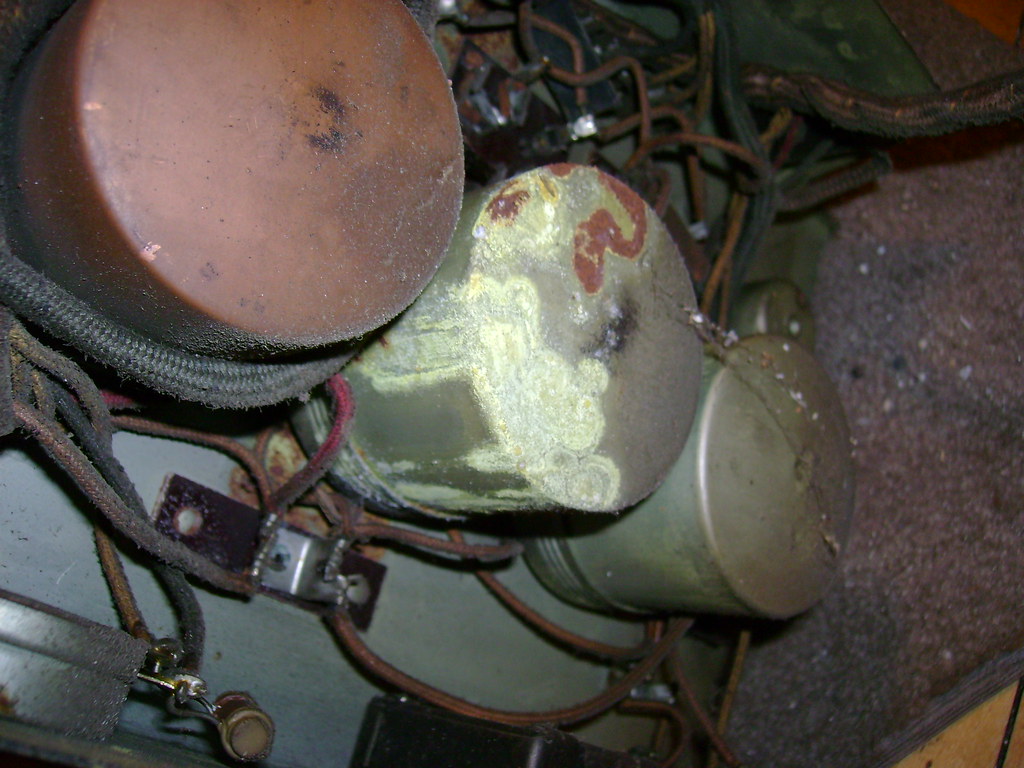 Luckily it's just surface corrosion and it came off easily with some rust remover. I couldn't resist trying a little metal polish on them The plating is gone from the corroded areas so they're dull grey.Of course, no one will ever see them on the underside of the chassis once it's back together. 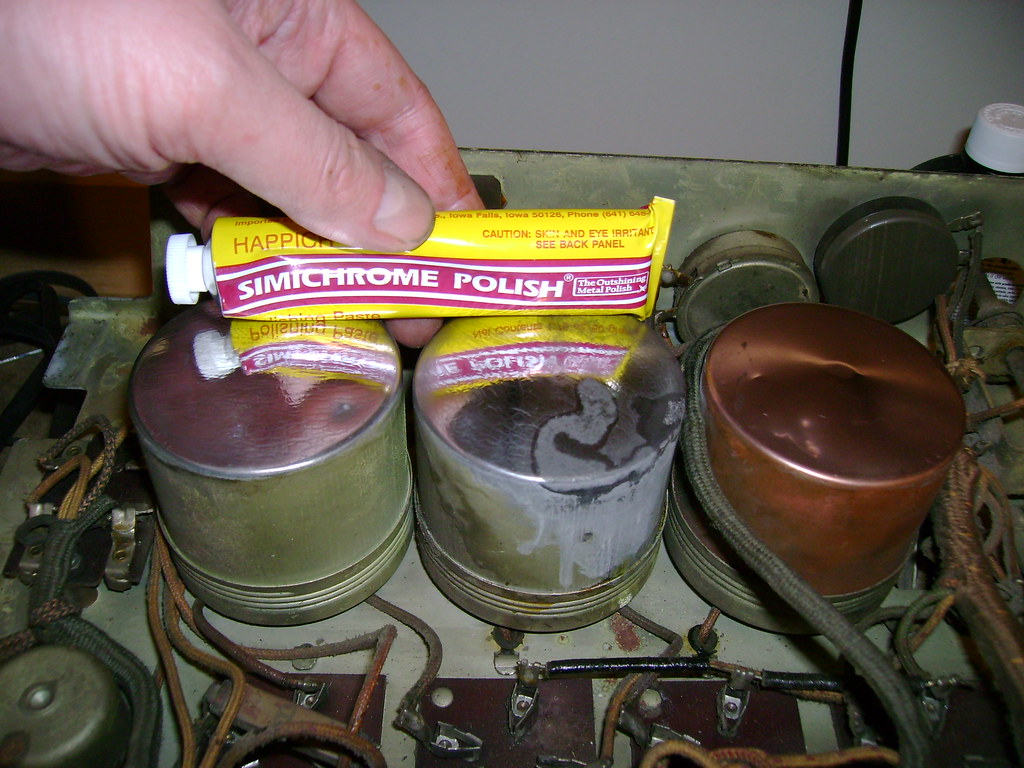 I didn't realize cadmium polished up this well. I just may have to go over the entire topside. I wonder how long before it starts turning green again  
|
|
#75
01-24-2010, 05:11 PM
|
||||
|
||||
|
Thanks! Yes, I'm taking precautions and I really should have mentioned that. Cadmium is nasty stuff
 Here's a lilnk to more info: http://en.wikipedia.org/wiki/Cadmium_poisoning
|
| Audiokarma |
 |
|
|


 Linear Mode

