
|
|
|
#1
 10-23-2010, 10:26 PM
|
||||
|
||||
|
Philco 60 restoration
I figured I start a new thread on this Philco since it's no longer a mystery
 I brought it inside and took a closer look at it. The cabinet is nicer than I realized at first. Of course, it has the dreaded metal caltrop feet. I pulled those and put on some felt pads  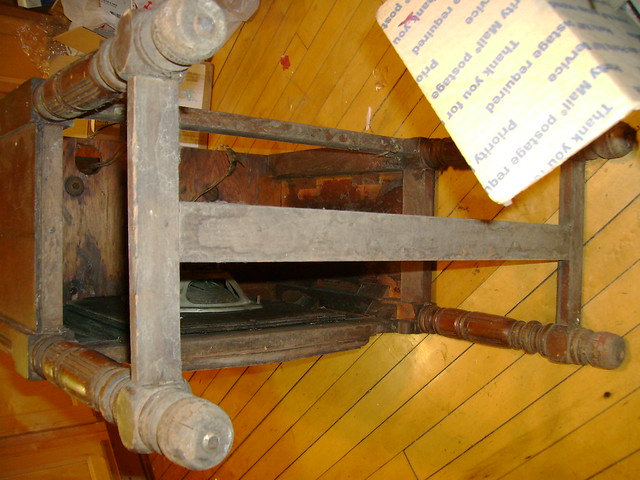 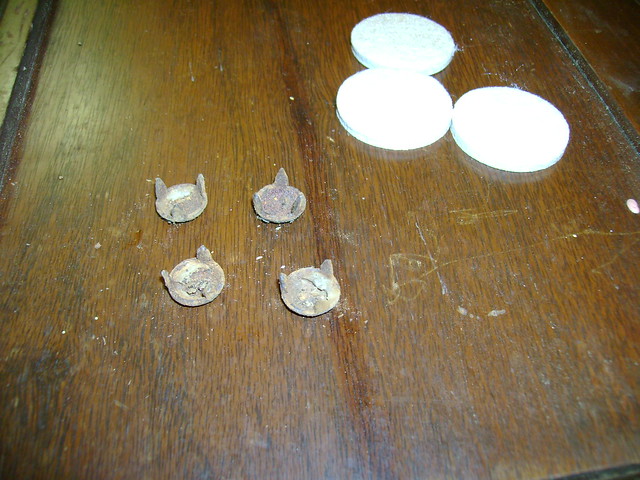 Here it is next to my 70 which has been badly refinished (not by me!). 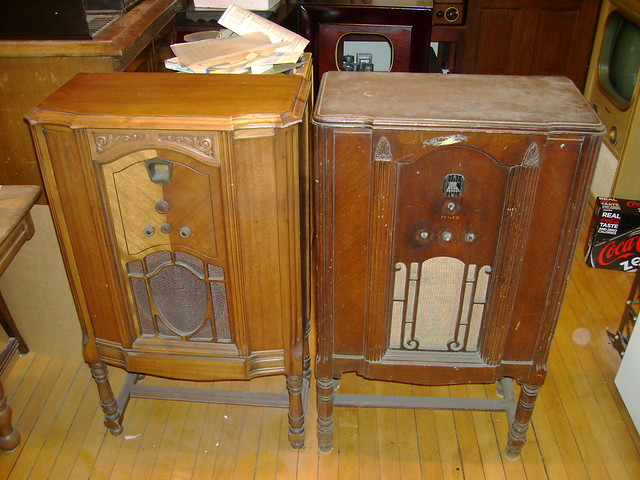 I really hate the way they hard-wire these speakers. The only way to pull the chassis is to cut them or pull the speaker too. 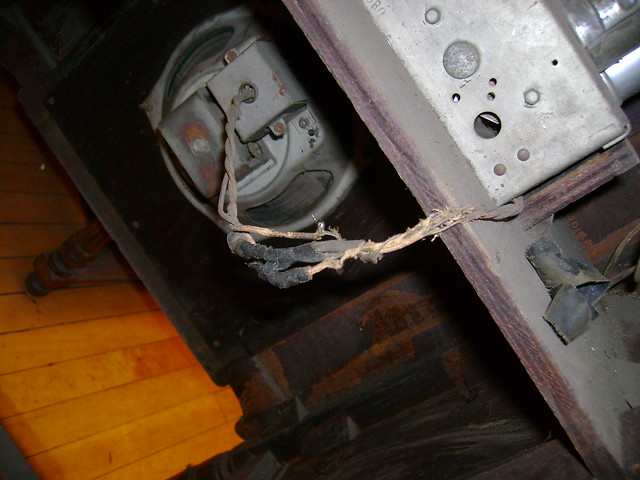 There's been some work done on it. Looks like they just tacked the new caps across the old  There are some new resistors too. There are some new resistors too.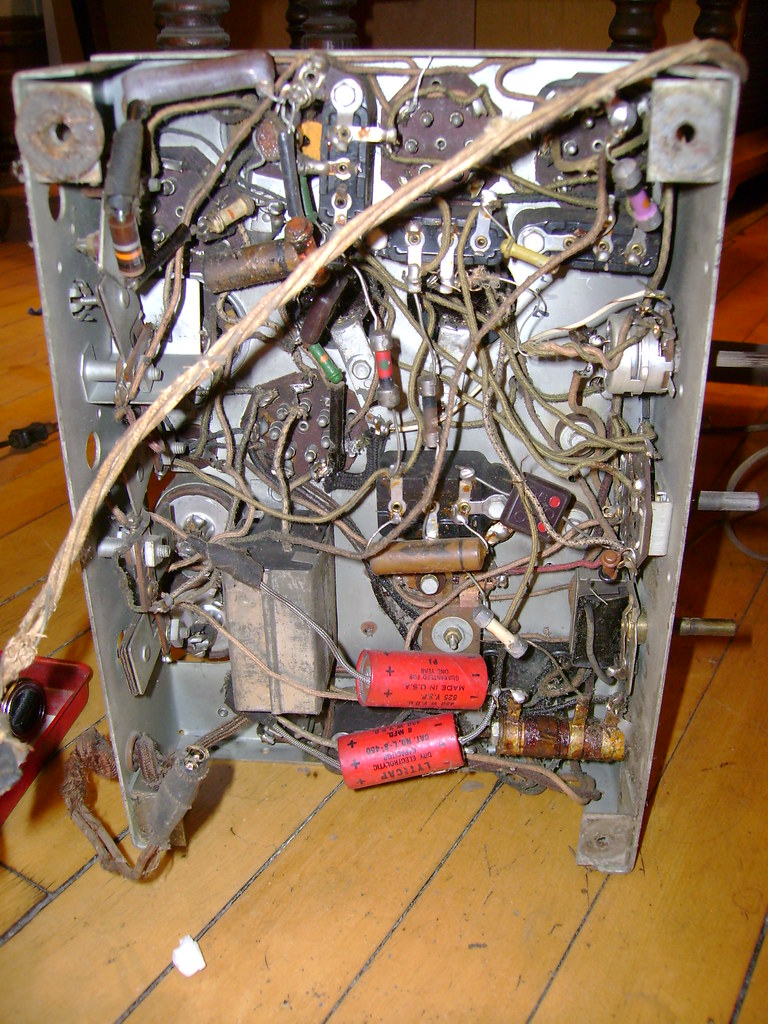 I should probably get a new dial scale since this one has warped. 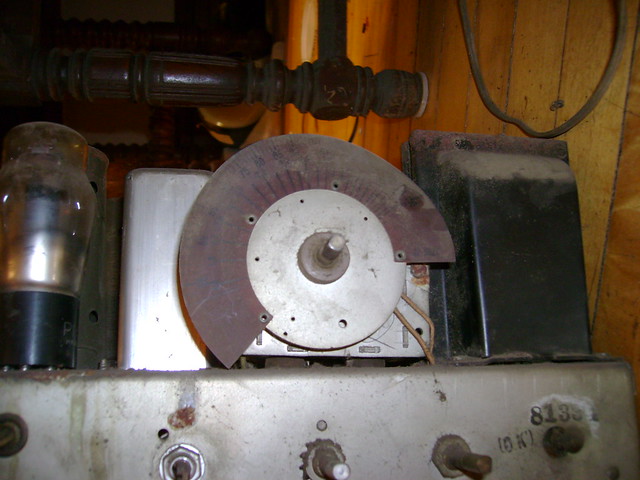
Last edited by bandersen; 10-23-2010 at 10:29 PM. 
|
|
#2
10-23-2010, 10:28 PM
|
||||
|
||||
|
Quote:
Would the controls on a Midwest line up in this cabinet ?
|
|
#3
10-23-2010, 10:53 PM
|
||||
|
||||
|
I was doing a little research and stumbled across Phil's excellent restoration writeup: http://www.antiqueradio.org/philc08.htm
That will be a big help for sure
|
|
#4
10-24-2010, 11:08 AM
|
||||
|
||||
|
I've always redone the wiring on Philco speaker harnesses-they just don't seem to hold up that well. I have a roll of cloth-covered brown wire for just such a purpose. As far as the tacked-on repairs go, that is how they all seem to have been done. I know Philco had radio-counter displays so you could grab the replacement bakelite block you needed, but they apparently never sold many of them.
I restuff bakelite blocks, but I don't use the heat gun/oven methods, I just pull the block, and chisel out the guts with a small screwdriver. It takes about two minutes to get them all cleaned out. One of the blocks in my 60 had two mica caps in it, so I just let it be, since the other micas in the set tested fine.
|
|
#5
10-24-2010, 01:29 PM
|
||||
|
||||
|
I'm always harping on this, but I would put a plywood bottom shelf under that speaker all the way to the back of the cabinet to enclose the bottom of the speaker compartment. The way they made them there's an acoustic short circuit from the front to the back of the cone: result, less bass.
__________________
Reece Perfection is hard to reach with a screwdriver.
|
| Audiokarma |
|
#6
10-24-2010, 04:03 PM
|
||||
|
||||
|
Quote:
 There's also a 5-section cap in a metal box. I hope that won't be a pain to restuff. I hope I won't need to do an alignment. I'm amazed at how many trimmer caps there are. Something like 7 in total. 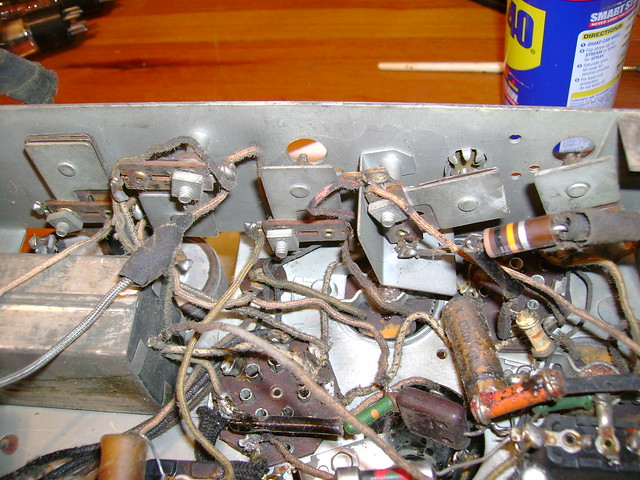 Quote:
|
|
#7
10-24-2010, 06:50 PM
|
||||
|
||||
|
Quote:
__________________

|
|
#8
10-24-2010, 07:28 PM
|
||||
|
||||
|
Seems that (some) early moving-coil speakers, especially those with the spider screwed into the center of the pole piece, had a kind of stiff action and didn't have all that good bass response and so the power supply didn't have to have the best filtering, and since larger filter caps were expensive...could be that the speaker, the speaker mounting, and the supply filters were all serendipitously ideal for the situation.
I think I read somewhere another idea about cleaning out those capacitor blocks: put them in the freezer for a while and the tar is easier to chisel out. Does that ring a bell?
__________________
Reece Perfection is hard to reach with a screwdriver.
|
|
#9
10-24-2010, 08:28 PM
|
||||
|
||||
|
The metal box isn't tough to work on. Just undo the nuts, pull back the tabs on one of the sides, and the wax-covered guts just slide right out. You'll spend more time wiring the replacement caps and wiring harness up.
|
|
#10
10-25-2010, 07:01 PM
|
||||
|
||||
|
I used to use an old pencil soldering iron, and plunge that into the tar on those black bakelites. Usually working one side of the cap, you could gently pry the whole assembly out. Have to be careful not to apply too much pressure to the side of the bakelite case, or it can break. Don't forget to check for soldered leads on those. It was a little messy but not bad. I think freezing the caps might be another option though I never did that myself. Keep us posted!
I think your dial scale may be fine. Most of them are warped. I would try placing it in a warm location and weighing it down to straighten it out. That might help. I would try doing that before getting a repro scale. Gilbert
__________________
I don't know anything about ignorance and I could care less about apathy. www.galaxymoonbeamnightsite.com Last edited by radio63; 10-25-2010 at 07:06 PM.
|
| Audiokarma |
|
#11
10-25-2010, 09:04 PM
|
||||
|
||||
|
Thanks for all the great tips! I'll definitely keep you guys posted. I plan on digging into it soon

|
|
#13
10-30-2010, 12:06 AM
|
||||
|
||||
|
Quote:
I decided to take a little time tonight and try to spruce up the cabinet. Here's the top as found  I used some Howard's Restore-a-Finish Walnut on it and slowly worked out the paint and stains. 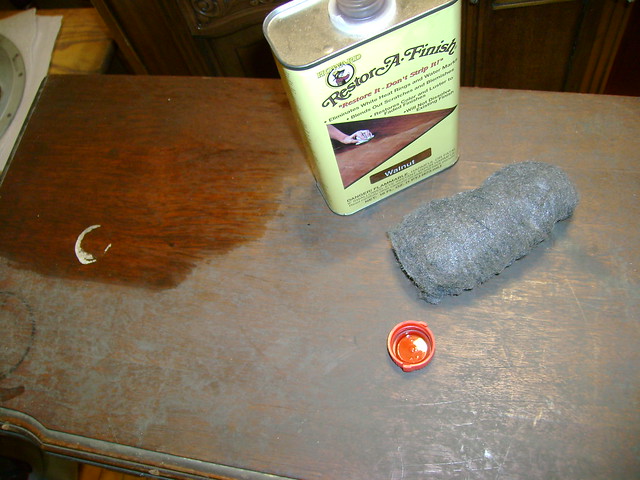 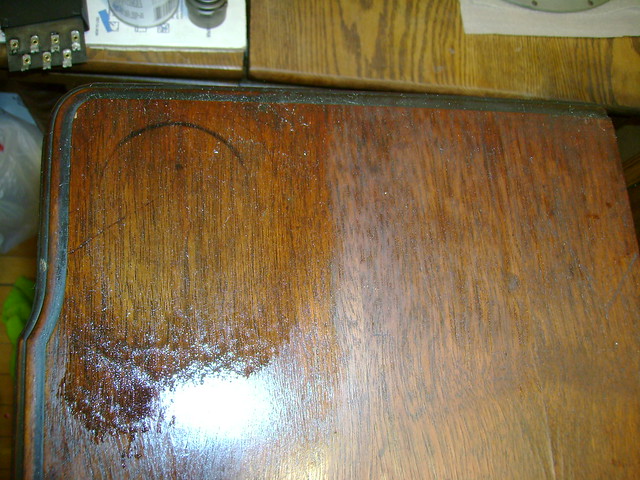 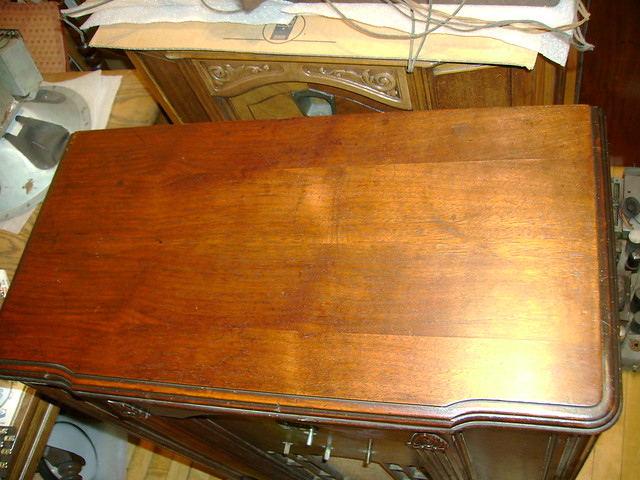 The fluting had some nicks and dings. The Howard's hides it a bit as would some stain. 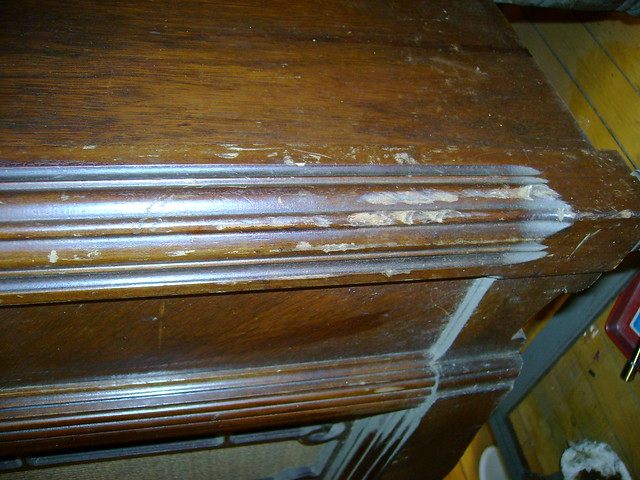 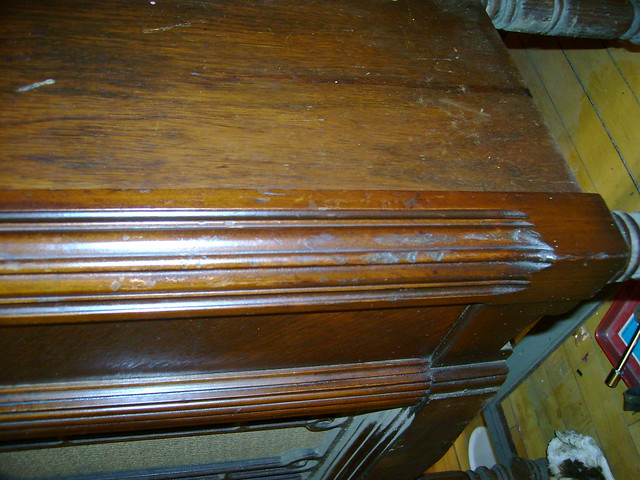 I used a brush dipped into Howard's to clean out the recessed areas and steel wool to clear off the paint. 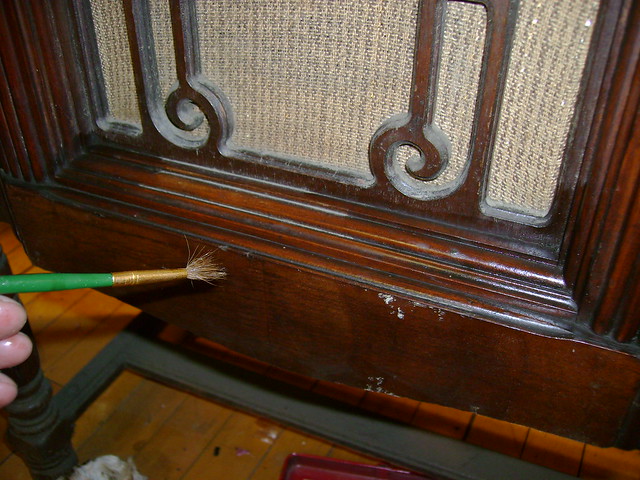 I can't do much about this kind of damage  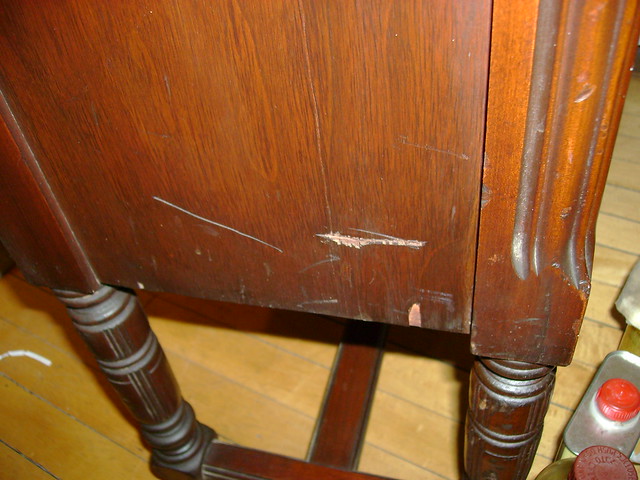 I follow the Howard's Restore-a-Finish with some Feed-n-Wax (orange oil and beeswax) and some Old English Lemon oil. This old wood was really thirsty Here's how it turned out. Still some more cleaning to do in the nooks and crannies, but otherwise a great improvement. 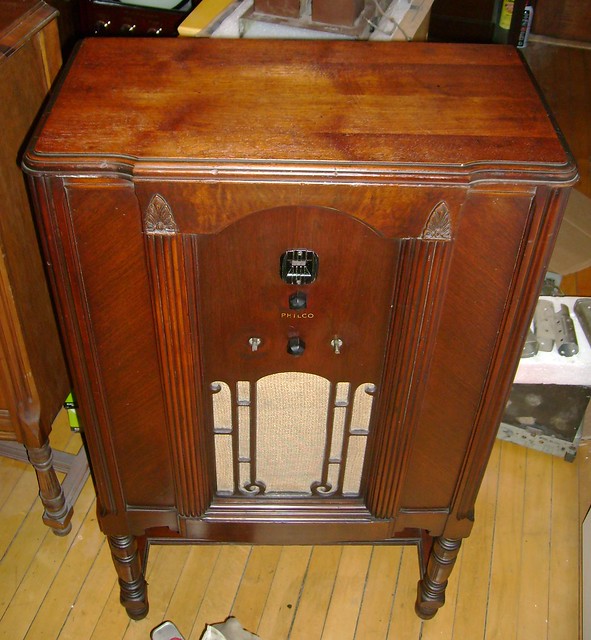 I do like to preserve and old finish when possible I certainly has more character than that badly refinished 70. 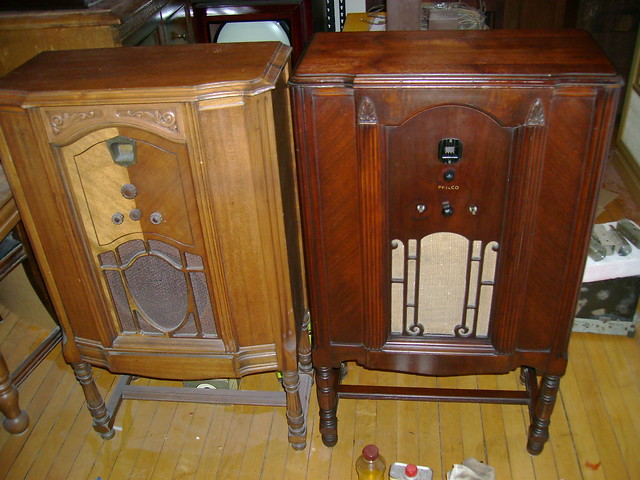 Can anyone spare a couple black hex knobs ? Last edited by bandersen; 10-30-2010 at 10:33 PM.
|
|
#14
01-05-2011, 10:16 PM
|
||||
|
||||
|
I've started poking around with this chassis. It has some deeply rusted areas and the tuning capacitor doesn't turn very well.
The tubes clean up nicely though 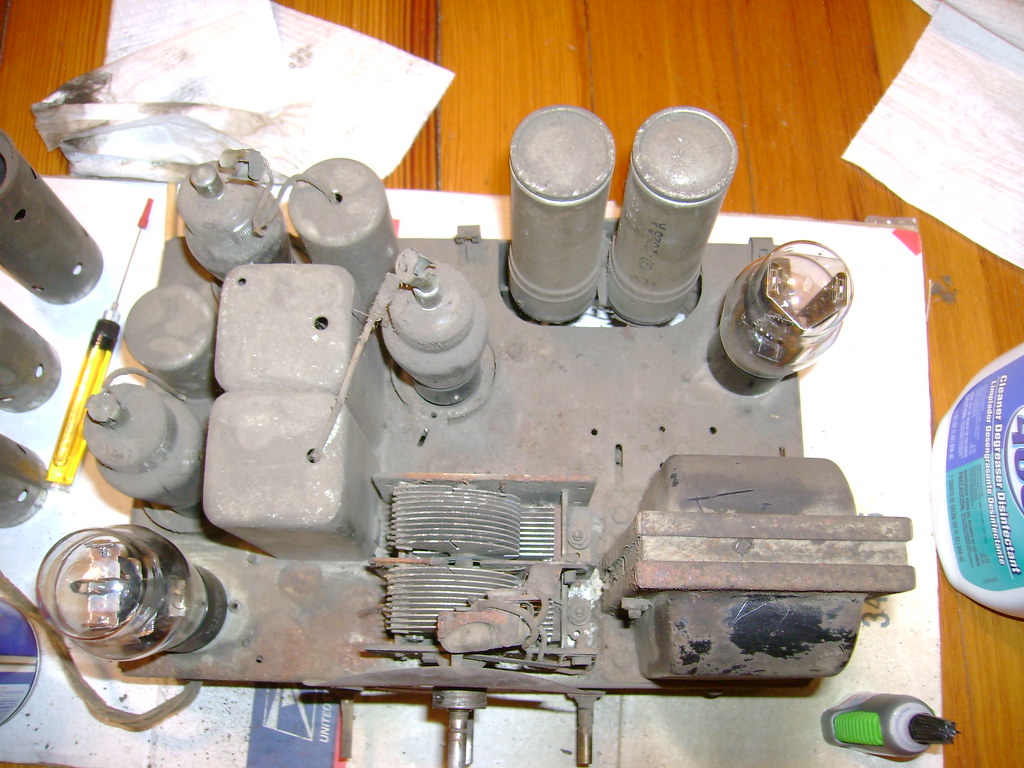 A closer look revealed a few bent plates. I straightened them out and cleaned out some of the dirt. It's rotating freely now. 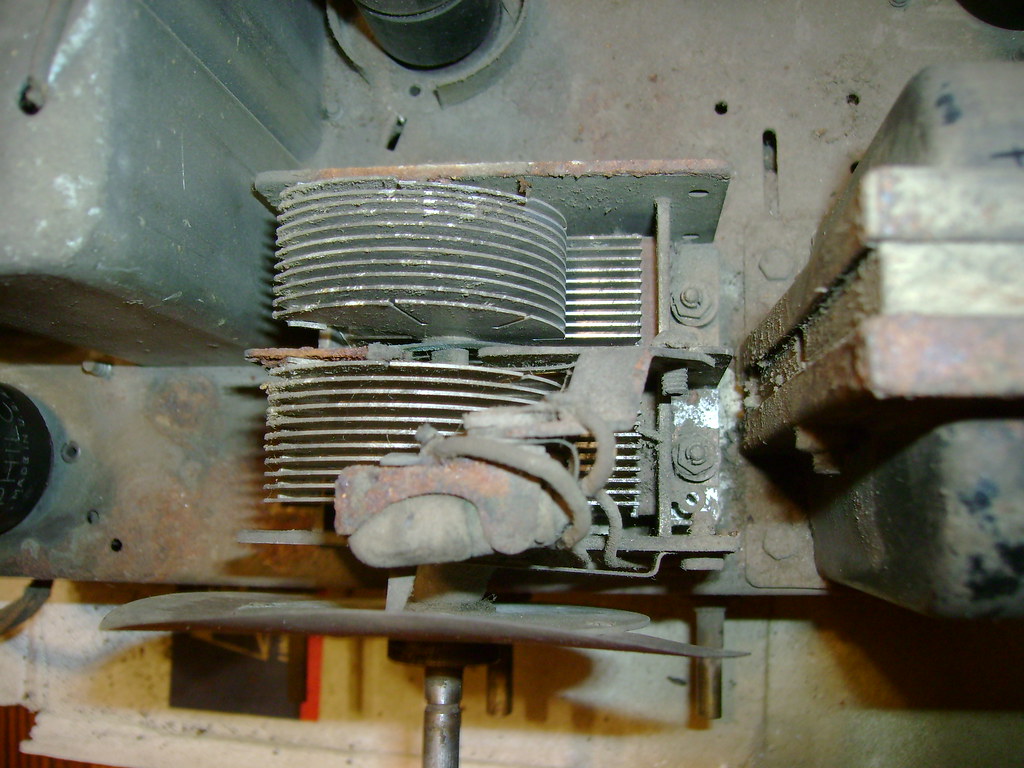 I'm going to remove all the old repairs and restuff the filter caps. 
Last edited by bandersen; 01-05-2011 at 10:28 PM.
|
|
#15
01-06-2011, 07:33 AM
|
||||
|
||||
|
Looks like a candidate for a soap up, scrubdown, and rinse. In this kind of weather, sitting it on an old towel in the bathtub!
__________________
Reece Perfection is hard to reach with a screwdriver.
|
| Audiokarma |
 |
|
|


 Linear Mode

