
|
|
|
#31
 07-04-2017, 09:10 AM
|
||||
|
||||
|
I can't count how many times I grabbed a sandwich out of one of those machines, working late at university. Very cool to see that one being resurrected. Now all you need is a coffee machine, which drops the cup and then pours a cup of coffee.

|
|
#32
07-04-2017, 11:36 PM
|
||||
|
||||
|
I promised myself no more vending machines. TV's and old computers are one thing but Vending machines? Unless I started up an arcade with storefront I'm not going to invest in a row of vending machines.
Anyways, the local surplus shop had a bunch of spraypaint that closely matched the original paint. $2.99 per can. I grabbed six cans of black for the door trim and hinges and 12 cans of olive grey for the main cabinet. All I need to find now is a buttload of cheap primer.  
|
|
#33
07-06-2017, 03:52 PM
|
|||
|
|||
|
Quote:
 No need for a row of 'em - one or two strategically placed units could be quite profitable. Last edited by Tim R.; 07-07-2017 at 01:21 PM. Reason: Expanding on my thoughts
|
|
#34
07-08-2017, 12:55 AM
|
||||
|
||||
|
While the idea has serious merit unfortunately the Pacific Northwest is in the midst of a property crisis. Chinese nationals investing in properties overseas to hide assets in markets propped up by others paying tens of thousands above asking, creating massive bubbles. The result is that even renting a 500 square foot residential suite is about $1500 per month with commercial suites starting at $2500. I'll leave the discussion at that as it can get pretty ugly.
If I owned property then sure but for now I simply cannot think of trying that. 
|
|
#35
07-08-2017, 03:19 PM
|
|||
|
|||
|
Quote:
Back to the vending machines - from what I gather, there's usually just an agreement with the building owner to park your machine on their property in exchange for a portion of the proceeds. So you might be able to avoid the whole rent mess completely if you're lucky.
|
| Audiokarma |
|
#36
07-14-2017, 09:34 PM
|
||||
|
||||
|
Surplus Herbs got in several cases of primer suitable for plastics. Its not perfect and it is a clear spray, but it IS primer, so I bought 12 cans.
This evening before the winds picked up for the weekend I primed and then put one coat down on the first parts of the machine. 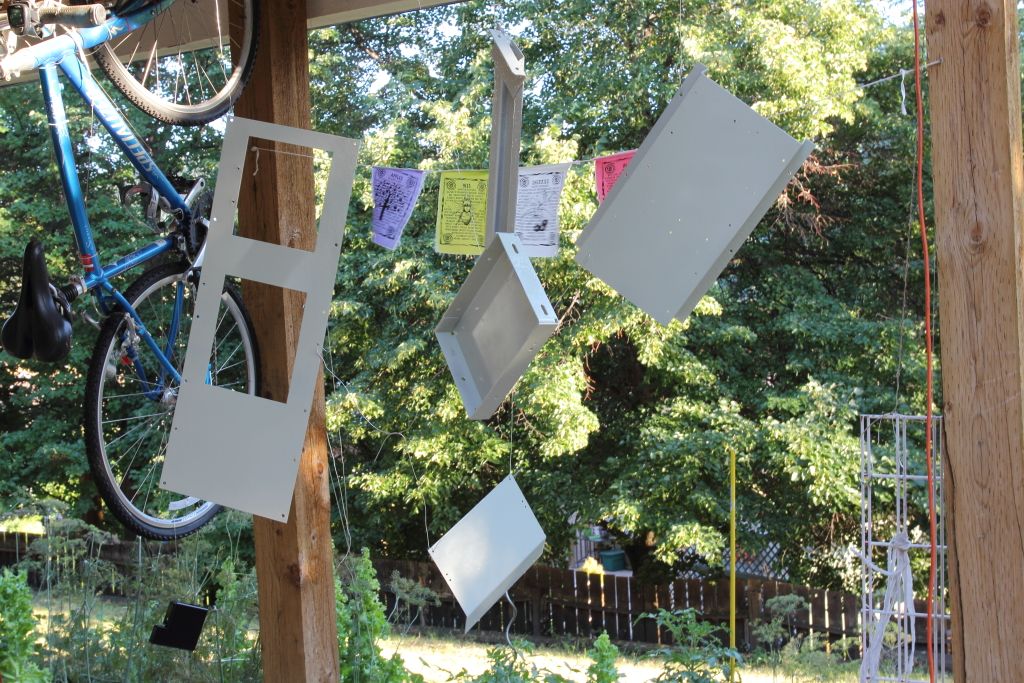 Direct link to image above I also did the bottom plate and the inside of the lower portion of the machine. I might run out of paint before I finish. I decided the interior parts will only see a prime and one coat of paint. The outside Im hoping to have two cans reserved for each side and the bottom. There are five more cans left at Herbs so Ill have to buy that just in case. The wind at least will be nice so I can sand the exterior in preparation for priming. It doesnt need to be stripped clean. Just enough to clean any dirt or rough spots.
|
|
#37
07-17-2017, 10:32 PM
|
||||
|
||||
|
Heavy smoke means no wind. Perfect time to tackle priming again.
Before I pulled out the sander I did a little uh, mechanical adjustment to bend the one side of the cabinet back in shape. That brought it back nice and level.   For cleanup I attacked with my large sander. Really all I am trying to remove is any sun damaged or flaking paint. There are some larger scrapes or gouges in the original paint and primer but with at least two coats of primer and paint it shouldn't bee too noticeable. Once I get a side sanded I do a quick wipe and down goes the primer which goes down a slight shade darker so for the first layer at least I can see where I am covering.  Once the cabinet is totally primed I will give it a few days to set and then paint the top, reconnect it with the base and then while standing upright complete the last of the painting before rolling it back into the garage so I can start on the door. Last edited by MIPS; 07-17-2017 at 10:40 PM.
|
|
#38
07-22-2017, 07:08 PM
|
||||
|
||||
|
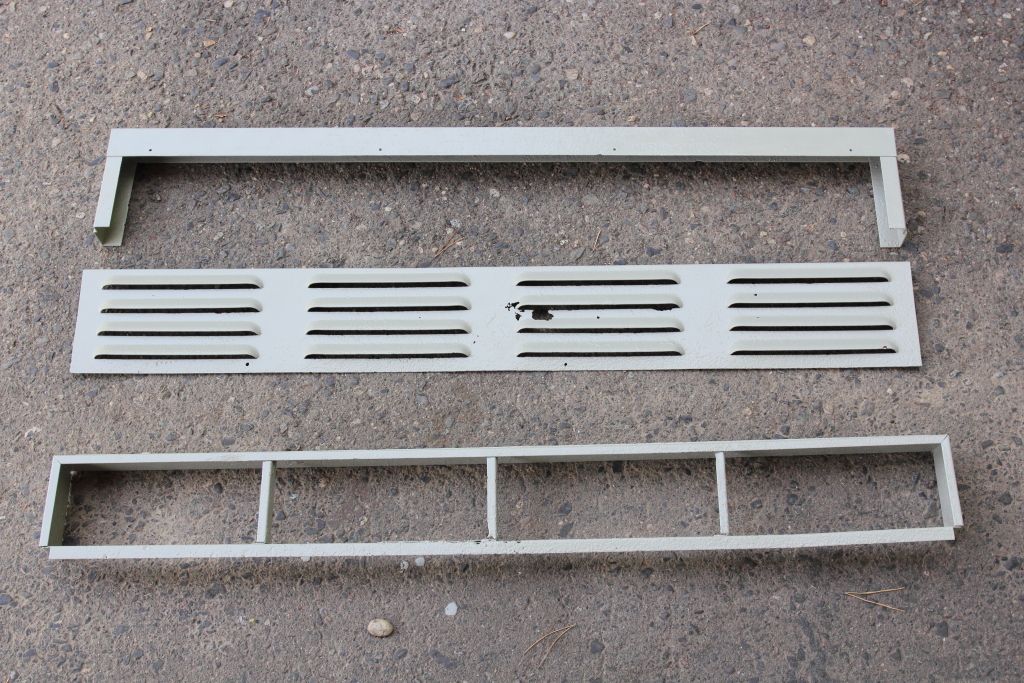
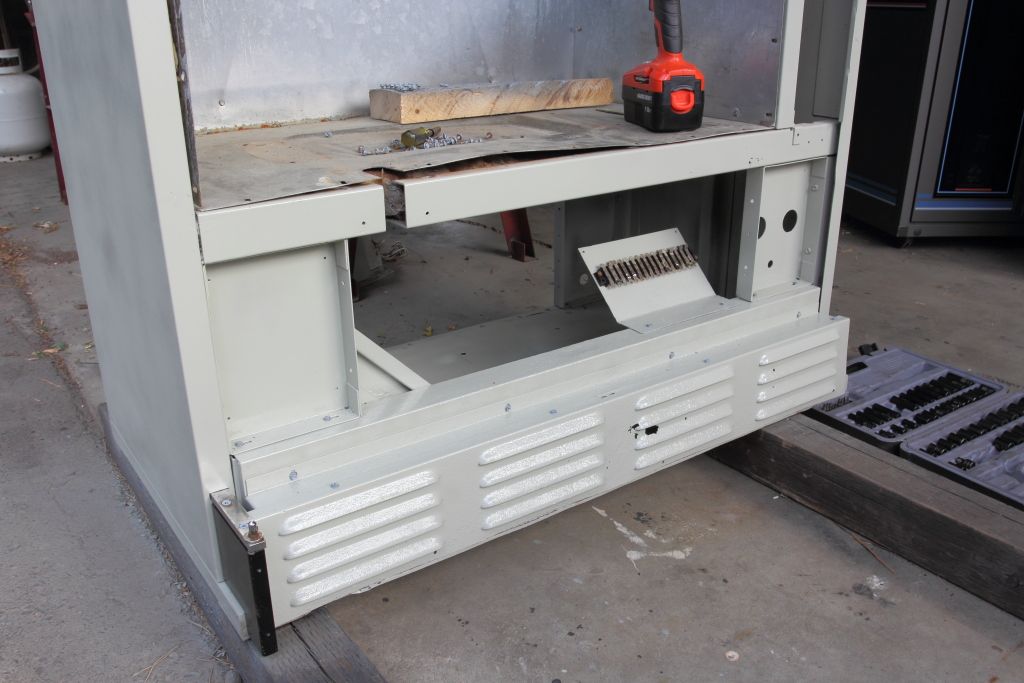
Before the wind picked up I cut, painted and reinstalled the base. Take a look at the old panel compared to the new one.
  I also took the moment to drill out the old levelling bolts because once this was upright again I didn't want to tip it back over. Bye-bye went the threads so I think I'll redo that with threaded bolts and a nut because I don't have a tap and die set. Just take two crescent wrenches and spin either the nut or the bolt and raise it the half inch or so you need to level the thing. I also started reassembling the electronics I already pulled out.  The panel on the right sat in front of the compressor and was the main power distribution terminal strip. The other piece is the plugboard for setting the door prices and the three ballasts and lamp starters for the lighting.  The little 15W ballast had to be replaced because it was so badly animal damaged. I had spare ones from a dismantled project at our local makerspace. I painted one black and bolted it in. The other two ballasts are another story. They are original to when I got the machine with no promises that they still work but because of their odd size and their requirement for starters I didn't have much of a choice but to clean, repaint and reinstall them anyways. They do both likely contain PCB's.
|
|
#39
07-22-2017, 09:24 PM
|
||||
|
||||
|
Simply AMAZING restoration - my favorite thread right now.
You and Bob Andersen - miracle workers. 
__________________
Brian USN RET (Avionics / Cal) CET- Consumer Repair and Avionics ('88) "Capacitor Cosmetologist since '79" When fuses go to work, they quit!
|
|
#40
07-26-2017, 03:18 PM
|
||||
|
||||
|
Quote:
I'm probably too heavy for such a procedure.
|
| Audiokarma |
|
#41
07-28-2017, 09:51 PM
|
||||
|
||||
|
Painting progress:
  Painting stops for now until my buddy gets back to me with those pieces to be sandblasted so I can reserve paint for finishing them. I am down to six cans of paint and then that's it. Likewise as I was expecting to be a problem the paint is going on uneven and attempts so far to deal with the overspray striping has not worked. Perhaps a finishing clearcoat will mask it? Alas, even though this has been baking in the sun for over two months I was STILL finding water dripping out of it when it was uprighted. I had to open the cabinet further to inspect the fiberglass insulation which was indeed still wet but the mold and rust damage was minimal so I've had them hanging on the line for the last week to bake the last of the moisture out of it before it gets slightly refluffed and reinstalled. There's another guy who restored a fridge on youtube who opted to replace the fiberglass with expanding foam but that is just asking for trouble should you ever need to get back into the machine again for any reason.
|
|
#42
08-13-2017, 02:30 PM
|
||||
|
||||
|
Well waddya know, the compressor still works.
I found a 57mfd 230v Mallory motor start cap and wondered what would happen if I swapped out the old 88mfd 165V. Sure enough once the cap was swapped out and power was applied the compressor puttered to life and spit out a little bit of oil. Okay then, so aside from a bad condenser coil the refrigeration unit suddenly became a rebuild candidate. Now to ask around to see if I can steal a new coil off another unit with a burned out compressor.
|
|
#43
08-18-2017, 01:19 PM
|
|||
|
|||
|
Quote:
Any luck finding a schematic for the wiring? Looks like you're almost ready to start putting the vending machine back together.
|
|
#44
08-21-2017, 07:19 PM
|
||||
|
||||
|
I have been unsuccessful at locating schematics. Nobody seems to have them.
I am almost done painting. There are still two parts that need to be sandblasted and painted. I only have six cans left with nowhere to buy tint matched alternatives so I can't do much more until those are done. I'll be picking those up this week and hopefully dropping them off at another sandblaster next week sometime.
|
|
#45
09-16-2017, 09:16 PM
|
||||
|
||||
|
The last pieces have been cleaned, rust treated and repainted. We are ready to proceed with reassembly.
  http://i11.photobucket.com/albums/a1...t/CGS_7703.jpg http://i11.photobucket.com/albums/a1...t/CGS_7705.jpg It was a good thing I waited until this was painted. One of my cans failed half empty so after four coats here and another coat on the sides I have one can left for emergencies. Also, here is the compressor now that it has been rebuilt. All it is missing is the replacement condenser and the fan then it can be purged and vacuum checked. 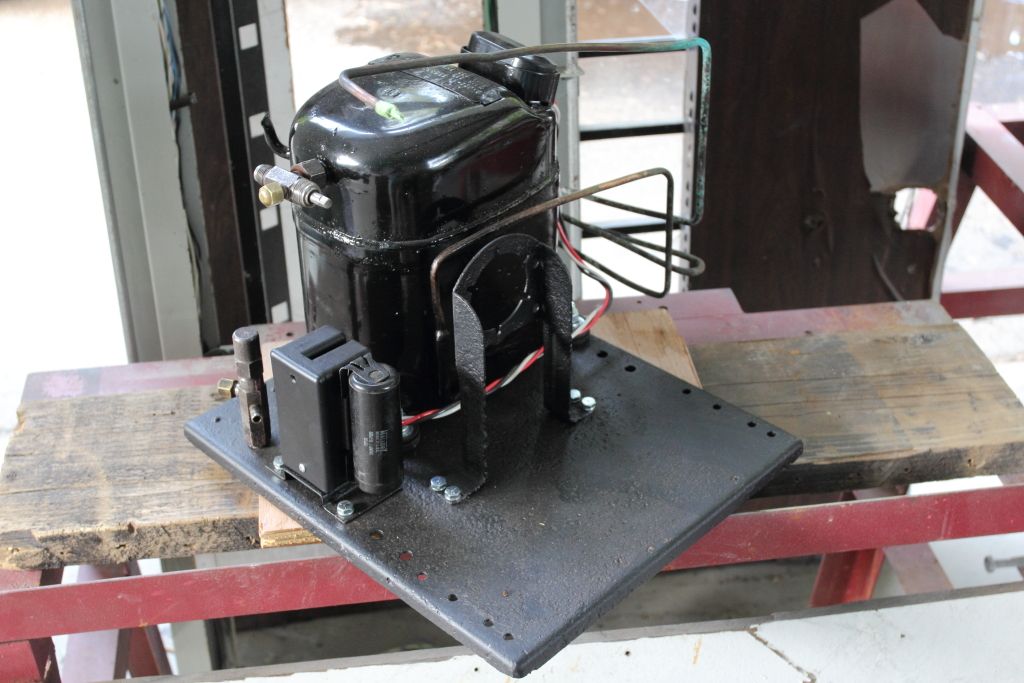 http://i11.photobucket.com/albums/a1...t/CGS_7706.jpg
|
| Audiokarma |
 |
|
|


 Linear Mode

