
|
|
|
#1
 09-07-2016, 09:01 AM
|
||||
|
||||
|
Capacitor Rebuilding
Forgive me if this is in the wrong forum...I didn't quite know where to put it.
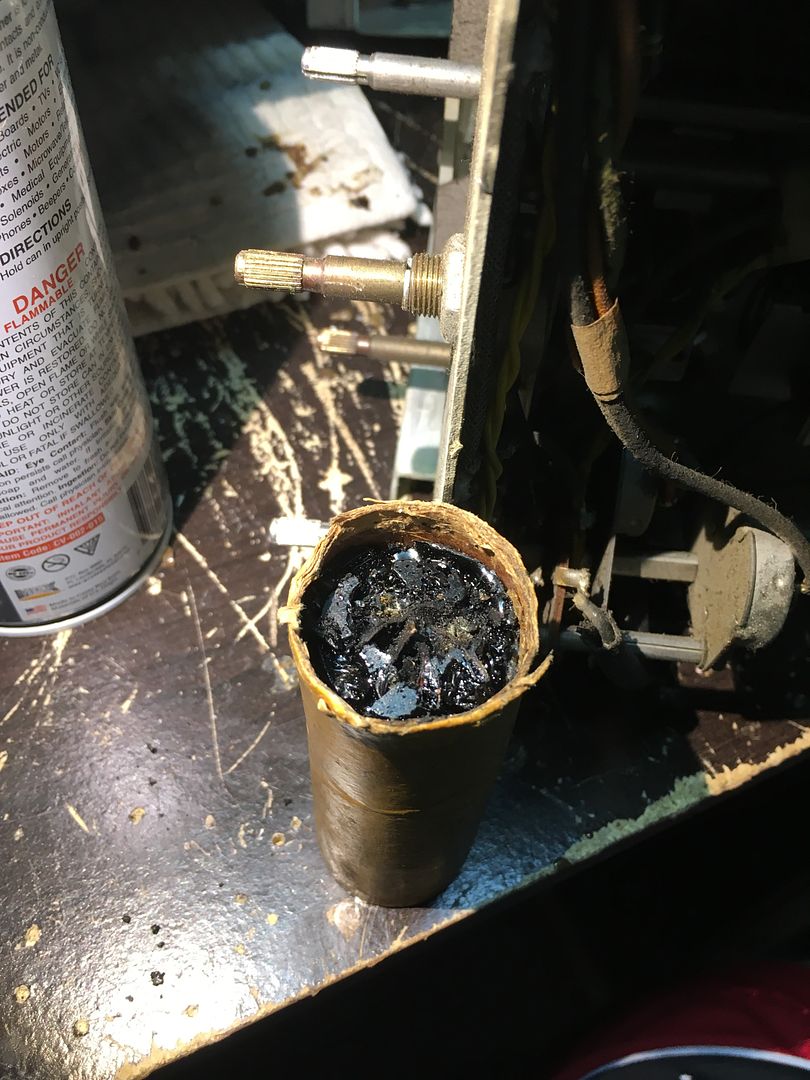
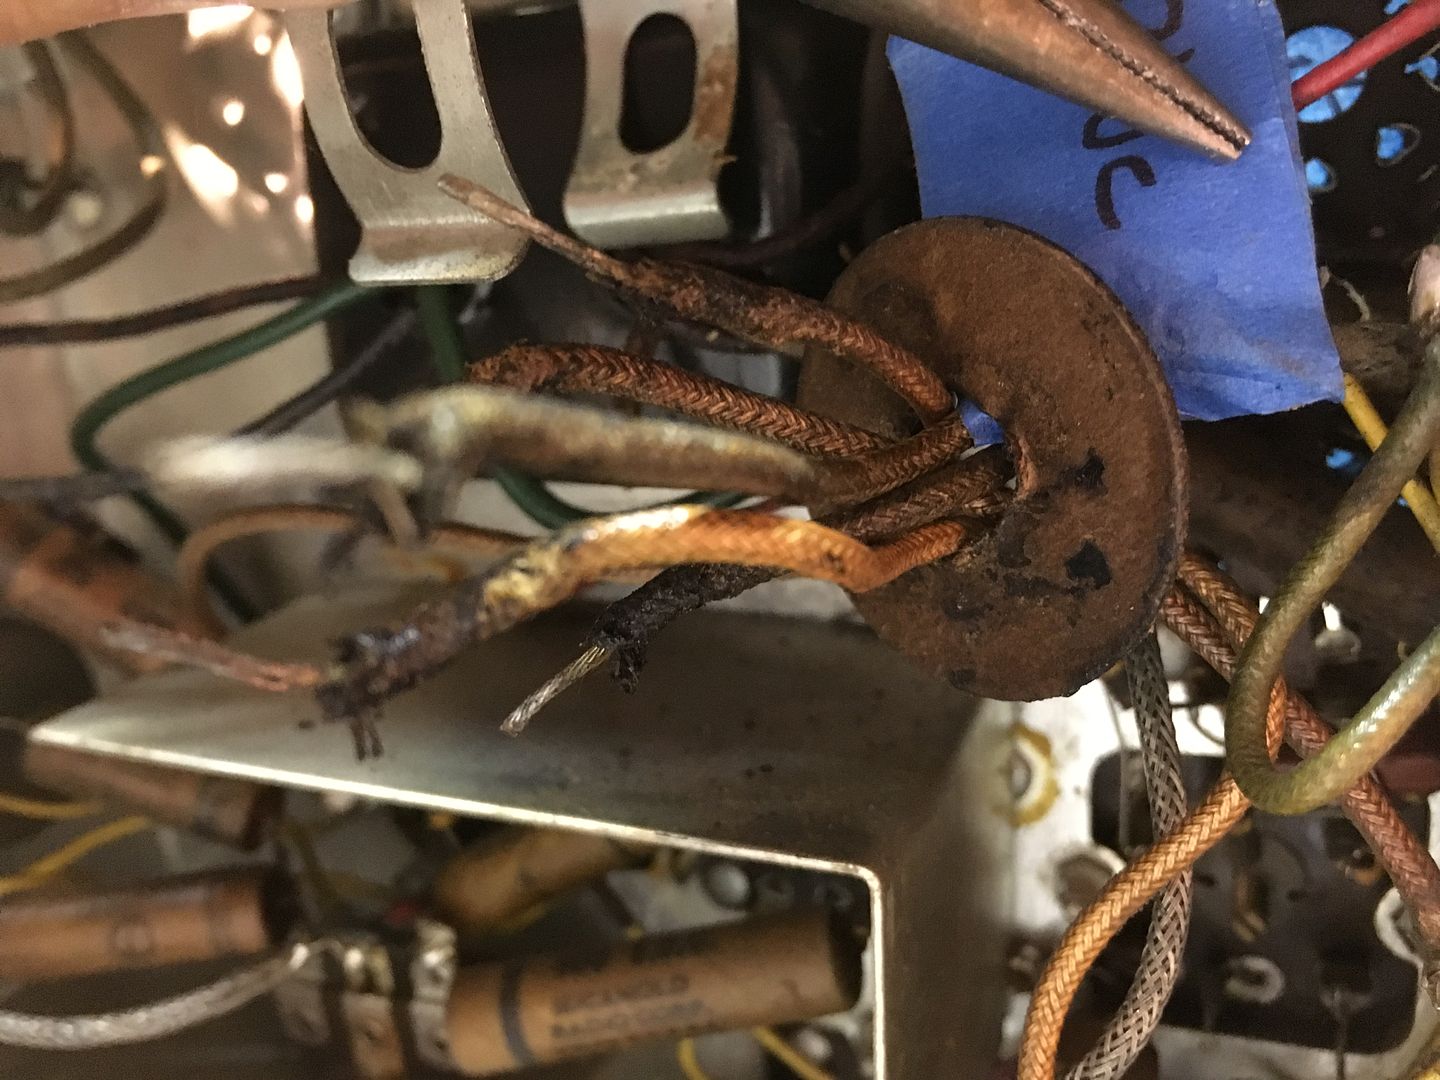
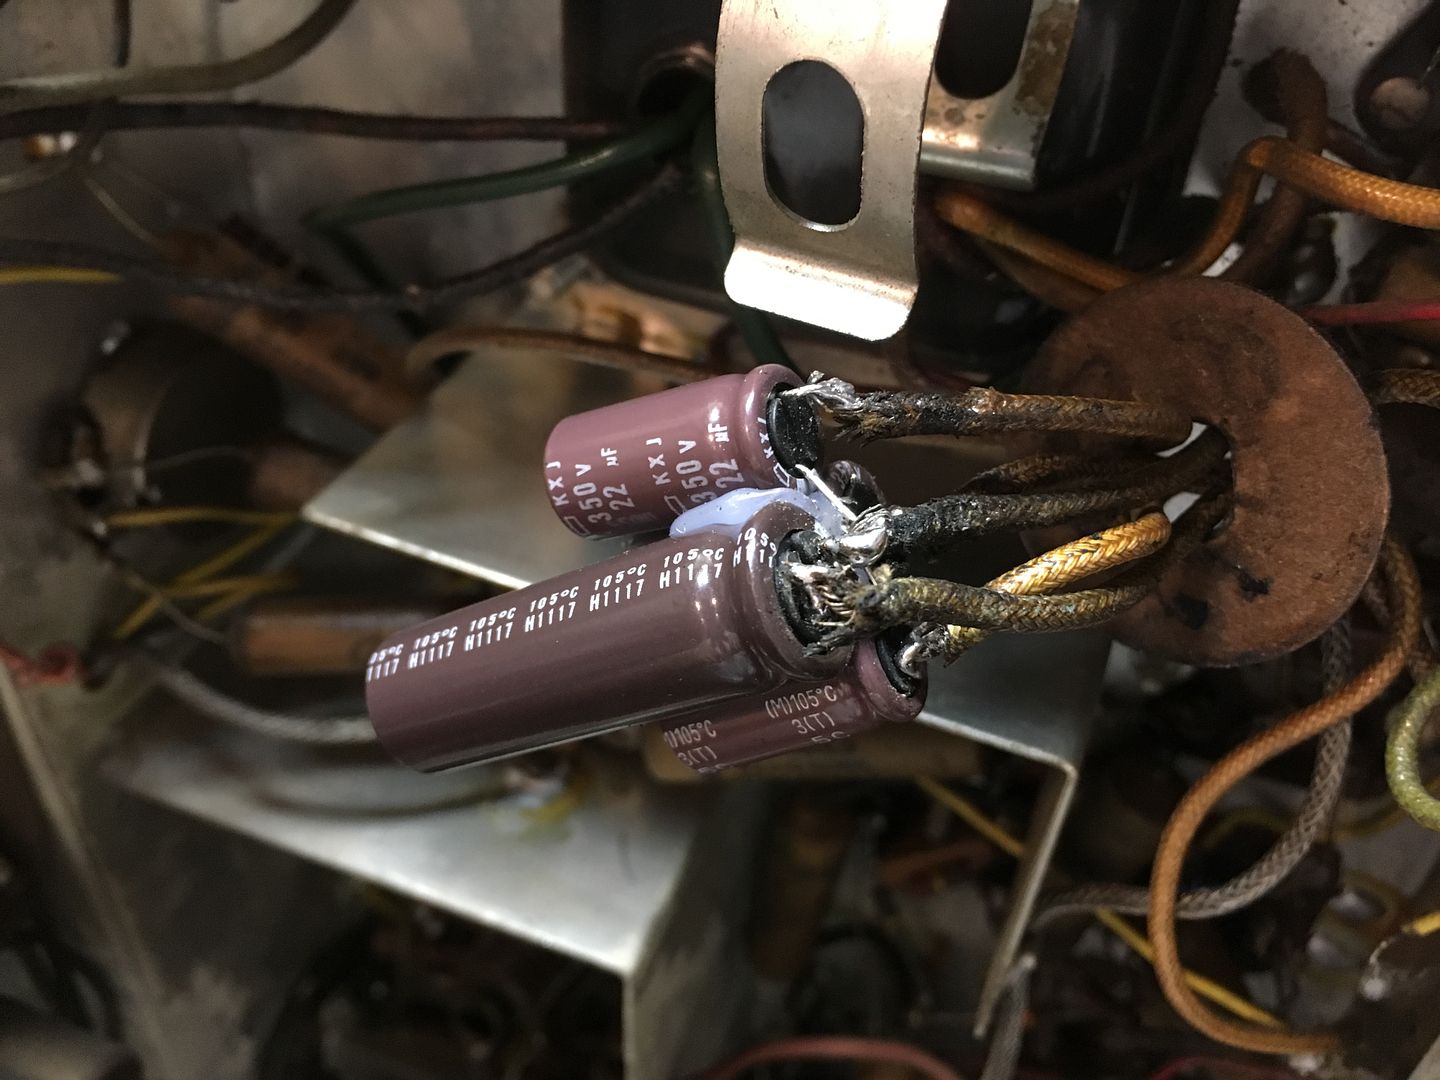
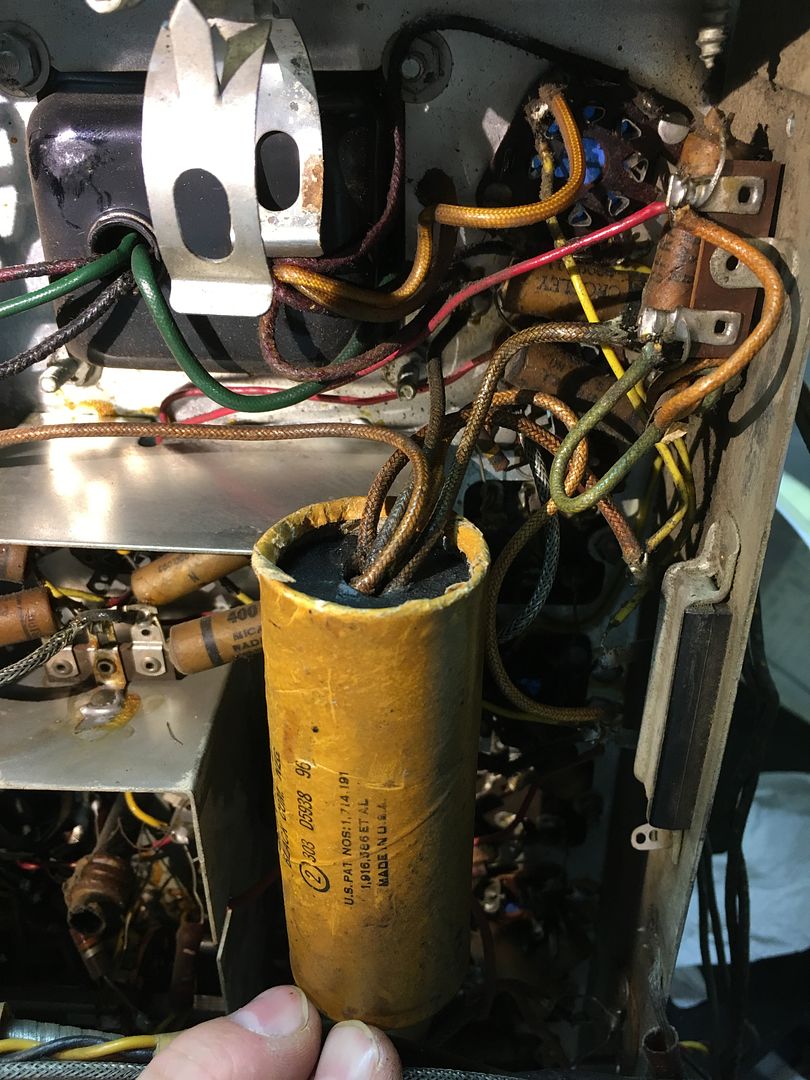
I am working on a television/radio/phono console and I came across the capacitor below in the radio chassis. I've never seen a capacitor like this one before. Has anyone here seen one of these? Is it tar filled? I'm trying to figure out how to rebuilt it. I can take a dremel to it and cut it in half, but I would much rather slide it out of its paper housing like I can with small single section axial electrolytics. Can anyone offer any insight? 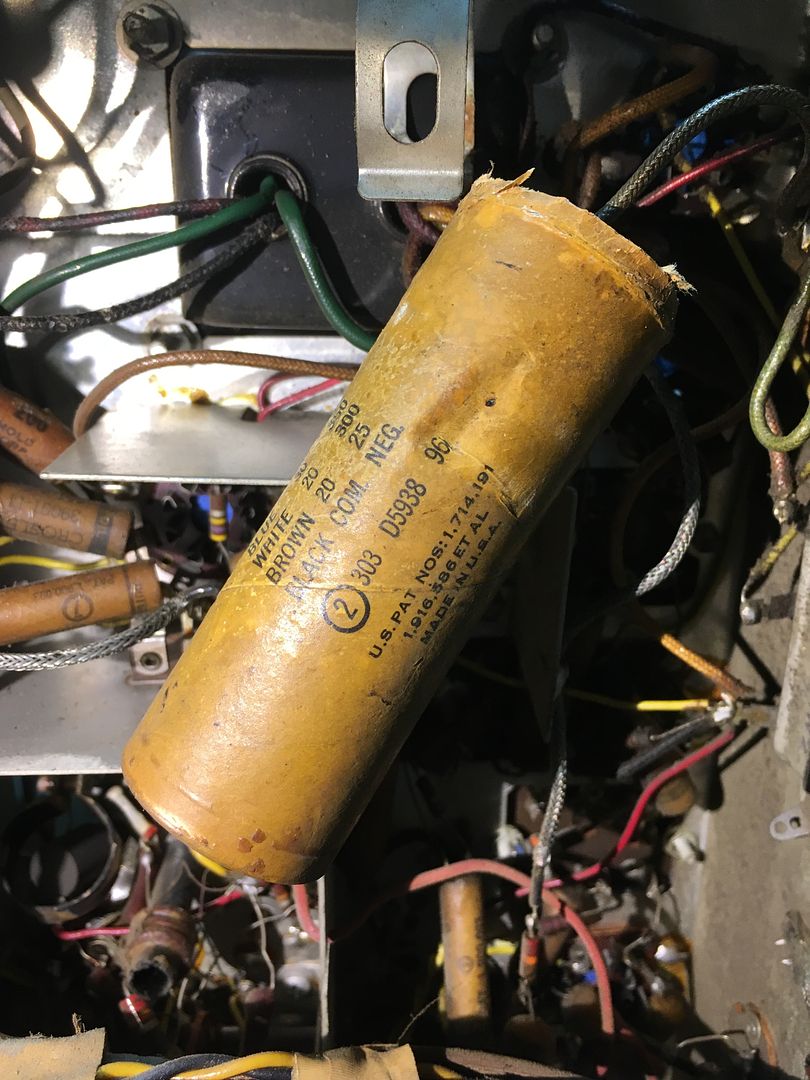 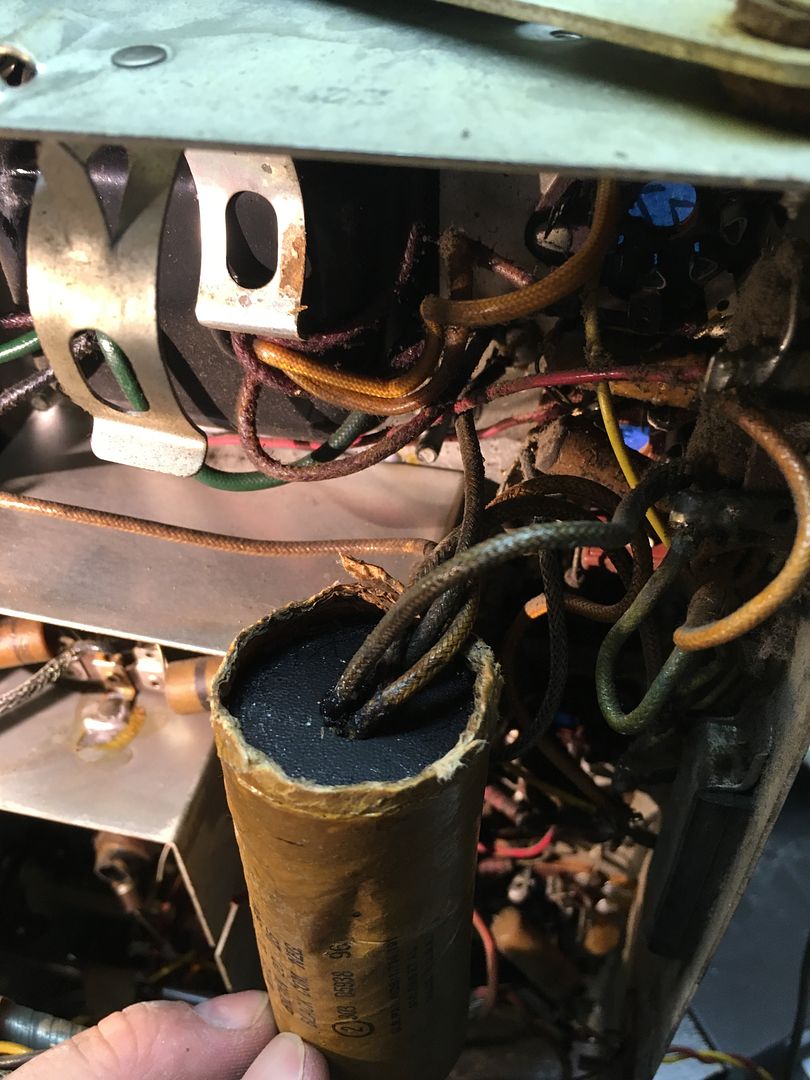
__________________
John 
|
|
#2
09-07-2016, 09:41 AM
|
||||
|
||||
|
Those are common in AA5 radios. It is probably tar filled, though some used wax or other substances.
I'm sure someone has found a way/reason to rebuild those....I always skip that type since IMHO it is too much of a pain relative to paper caps for me to bother with....Easiest way might be to scan it, print a copy, and wrap it around a toilet paper roll.
__________________
Tom C. Zenith: The quality stays in EVEN after the name falls off! What I want. --> http://www.videokarma.org/showpost.p...62&postcount=4
|
|
#3
09-07-2016, 10:38 AM
|
||||
|
||||
|
If you heat it in the oven to a couple hundred degrees or more the guts should slide out.
The usual precautions apply when dealing with hot Tar and such, wear gloves, use potholders etc. I agree with Tom though, these usually aren't worth the bother, I relocate the individual new caps to the connection points of the old cap if possible.
|
|
#4
09-07-2016, 11:31 AM
|
|||
|
|||
|
Quote:
They were a lot cheaper and shorter lived, than the aluminum cans. 
|
|
#5
09-07-2016, 01:06 PM
|
||||
|
||||
|
I use an inexpensive counter top toaster oven for dealing with tar messes like that. It's portable enough that I can take the operation into the garage, or even outside. I'm not all that fond of tar flavored pizza.

|
| Audiokarma |
|
#6
09-07-2016, 01:40 PM
|
|||
|
|||
|
If you are single, you most likely don't have a problem. However... those guys who are married, or living with a partner will have a real problem with heating that stinky stuff up in the house.
I live with my four cats. They don't usually protest. So, heating it up as mentioned will usually allow the "guts" to be extracted. You can then put new stuff inside of the cardboard tube.
|
|
#7
09-09-2016, 08:23 AM
|
||||
|
||||
|
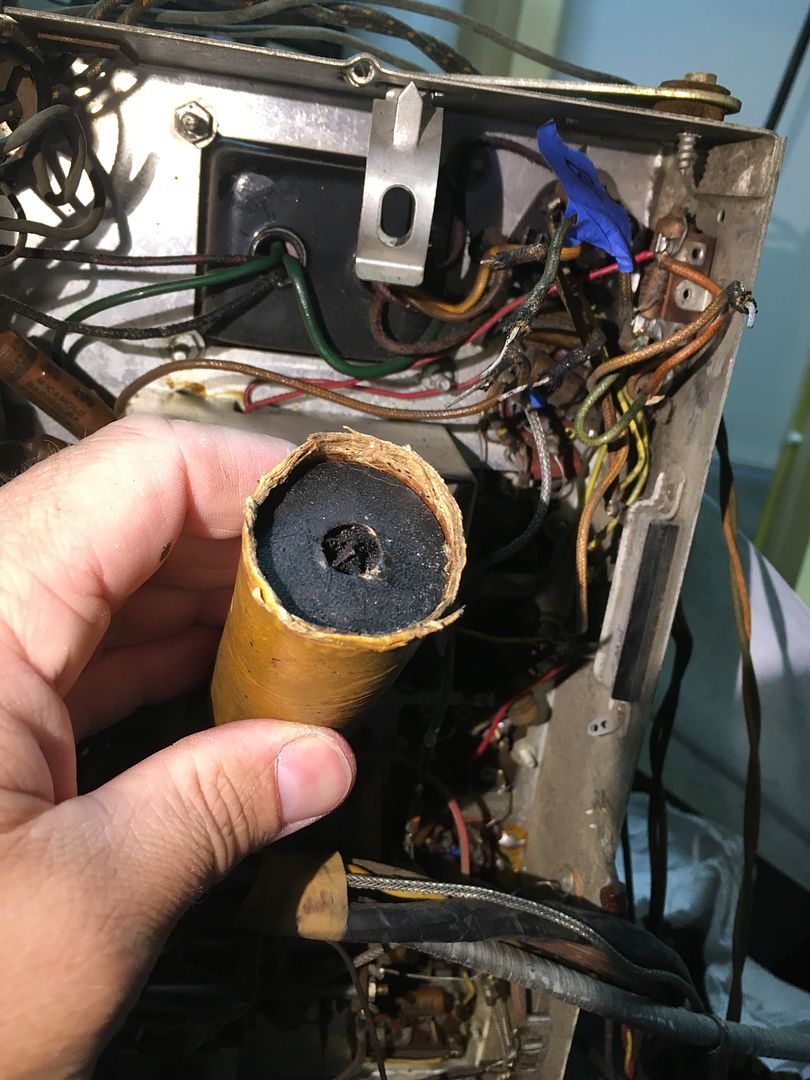
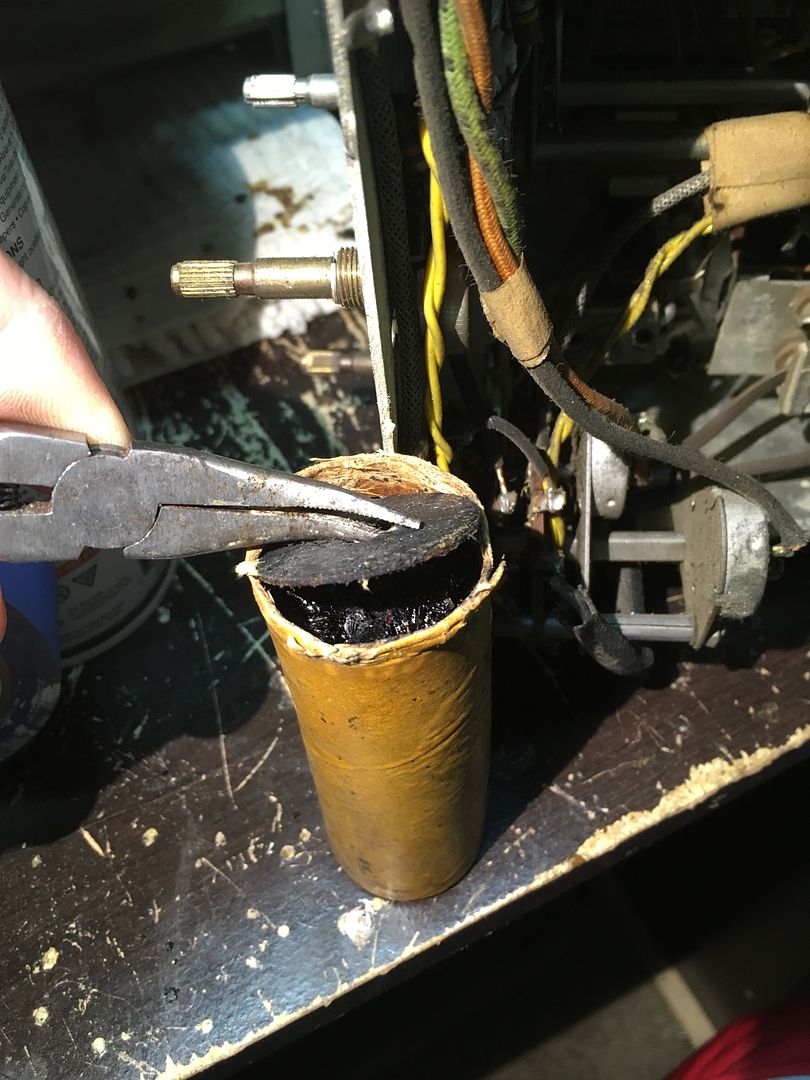
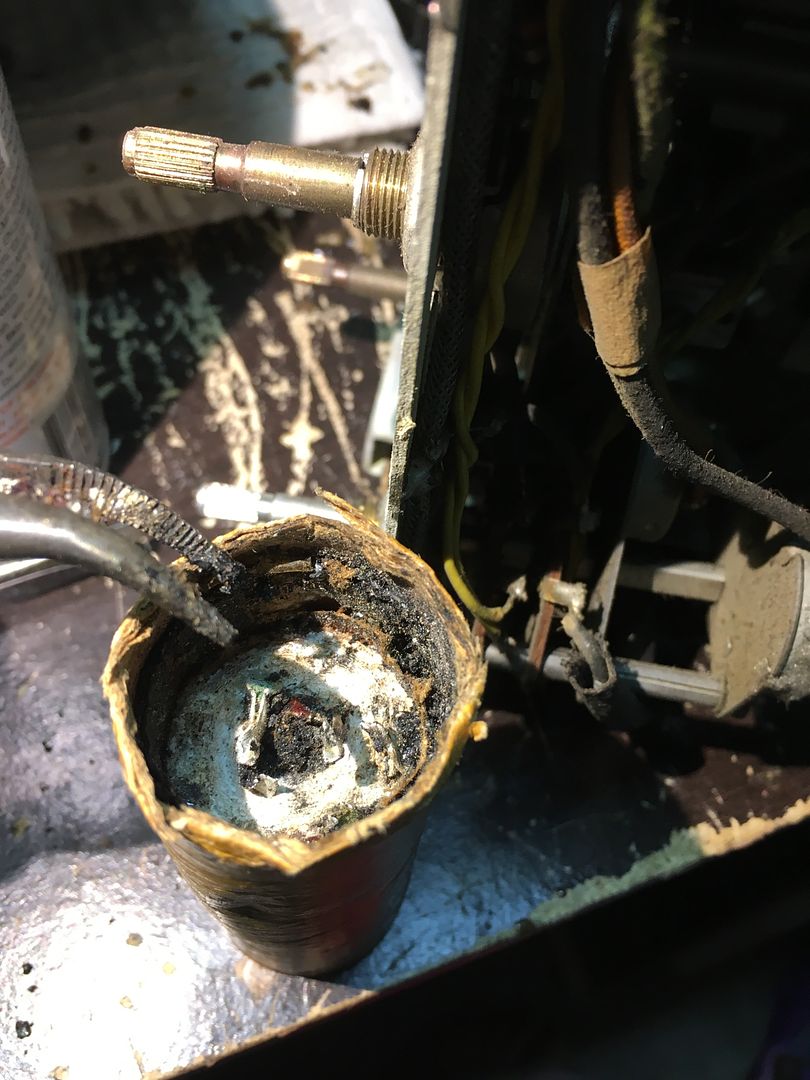
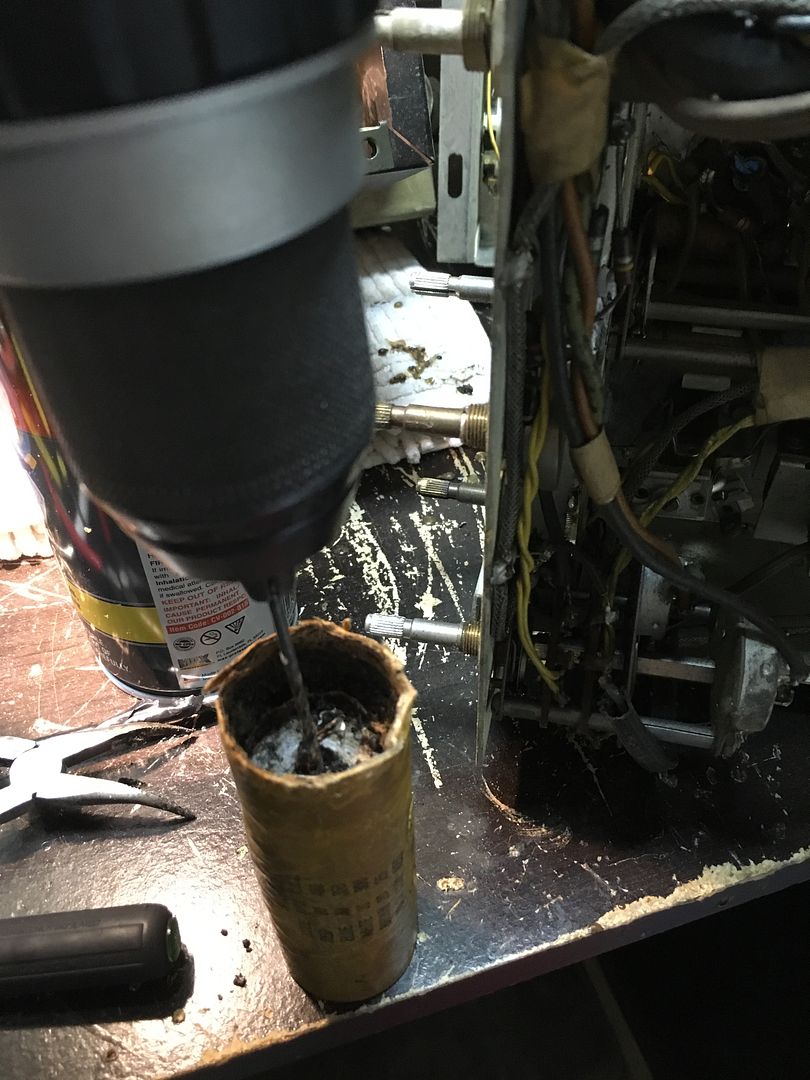
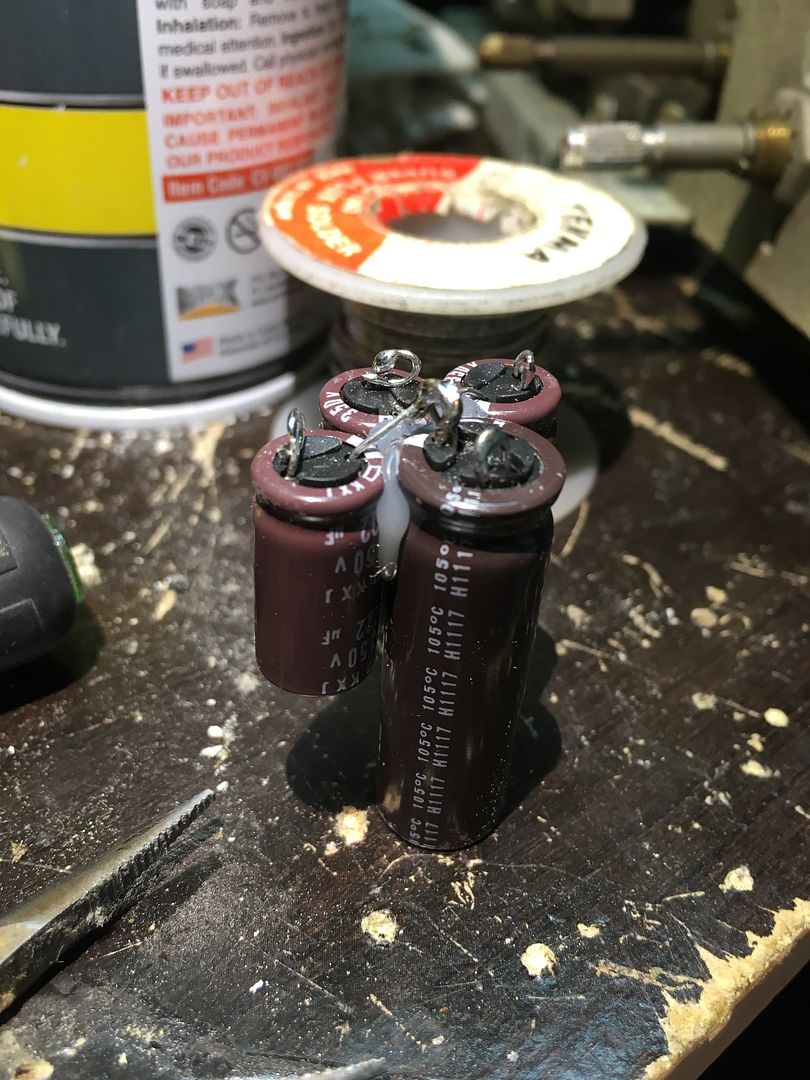
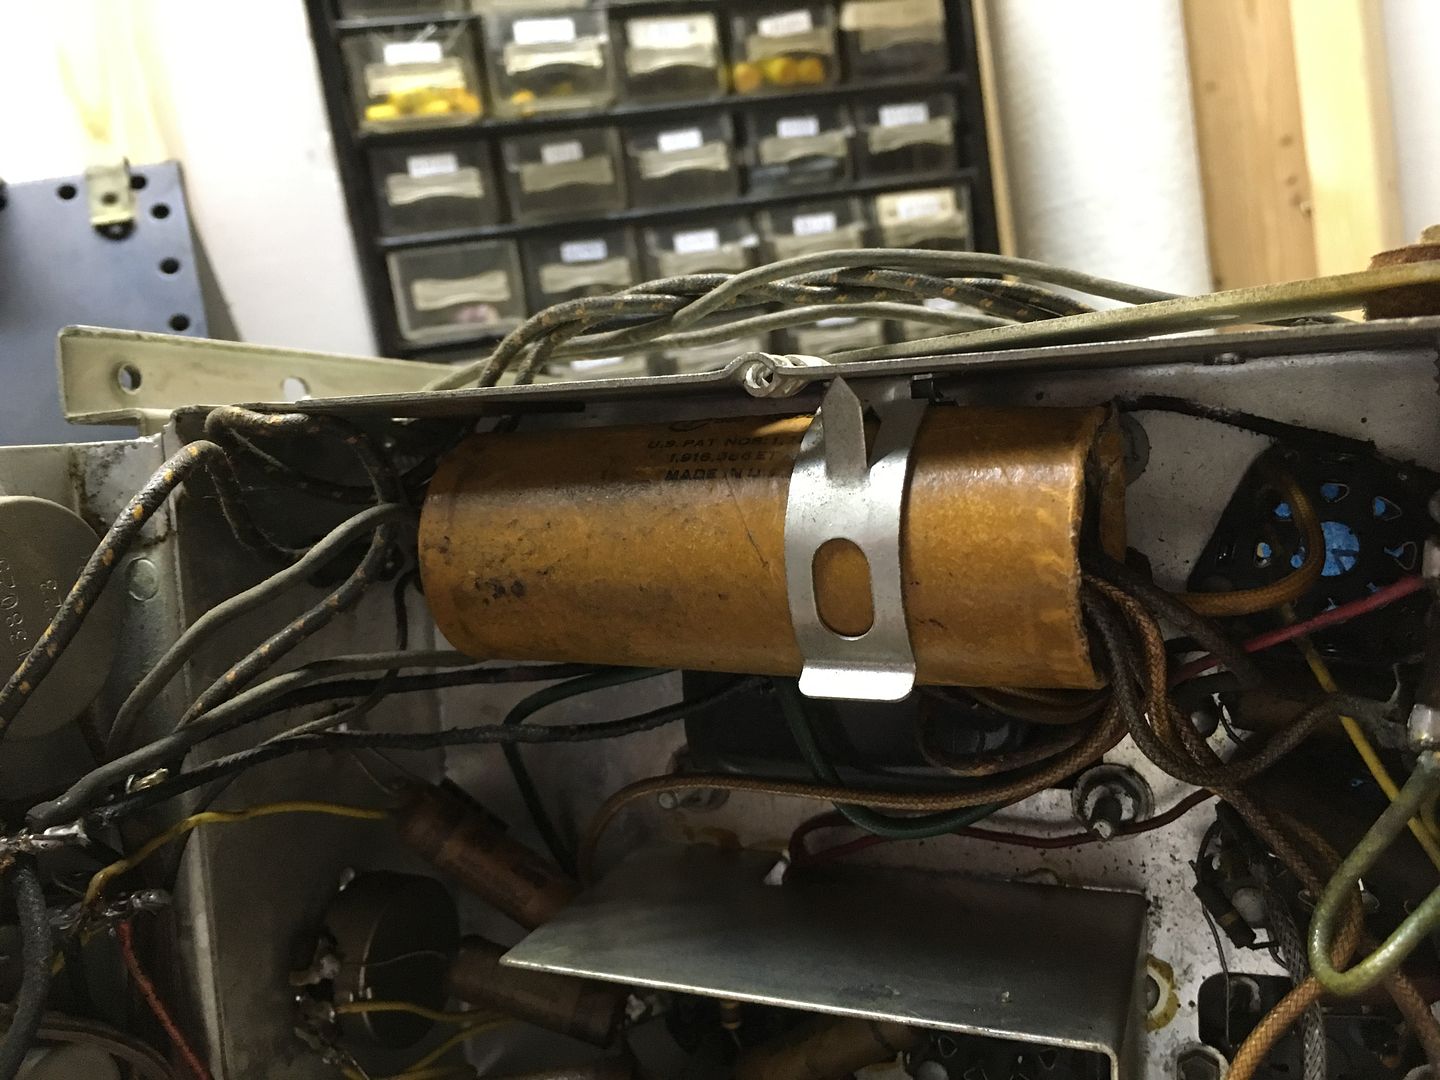
I got this guy rebuilt successfully, thanks to everyone for their advice. Here's how I did it: First I unrolled the top of the paper on the lead side of the capacitor as you can see from my previous photo. After unrolling the outer shell paper I pulled the leads out of the end. Pulling the leads out loosened the black "ring" at the end of the cap which I was able to lift out with my pliers. Below the ring was a solid layer of tar. Using a needle nose pliers (no heat) I chipped away and removed the layer of tar exposing the capacitor below. I removed the capacitor using a drill and needle nose pliers to chip away at it a little bit at a time. I left a bit of the outer layer of the original capacitor in the shell to add some structural support. This process was not quick or easy and I spent two nights working away at it. After the shell was ready I assembled my replacement capacitors and tested them for size. Next I slid the black "ring" over the 5 lead wires and soldered the new capacitors to the original leads. Finally I slid the original paper shell over the new capacitors, installed the black "ring," and rolled the end of the paper again. I'm very pleased with the results and although it took a few nights of work it was most certainly worth the effort.
__________________
John
|
|
#8
09-09-2016, 10:48 AM
|
||||
|
||||
|
That turned out great!
|
|
#9
09-09-2016, 04:24 PM
|
|||
|
|||
|
Wow! Your a patient man. nice
|
 |
| Thread Tools | |
| Display Modes | |
|
|


 Linear Mode

