
|
|
|
#1
 10-15-2006, 12:10 PM
|
||||
|
||||
|
Requesting cateract removal info
OK all your roundie nuts, The round tube noob has questions for ya'll:
How does one go about removing a cateract from the CRT? I've read about a few people who have done it, but they didn't provide a realy in-depth detailed explaination (or pictures for that matter) how its done properly. The tube I have now is in fairly good shape and the cateract is only noticable on a bright scene, but I would like to remove it someday while I have the set apart. More questions: What do you use to bond the safty glass to the tube after you have seperated the old bond and cleaned everything? Does the glass have to sit a certain distance from the tube face? What do you use to support the tube while performing the cateract surgery? A special lathe? Some other rig that keeps the tube in place? A big oil drum? What do you use to remove the old bond? a solvent, heat? I think all of your AK members other than myself would highly benefit from a thread detailing the procedure. If liabilty were to become an issue, perhaps we could stick a disclaimer on the thread, or members who would be willing to perform the surgery for a price could chime in. Just my thought, what do you guys think?
__________________
Jordan 
|
|
#2
10-15-2006, 01:44 PM
|
||||
|
||||
|
Ive done a few catercat repairs, the most successful method involved using a heat gun. I suggested the use of the heat gun after experiementation and others have found it to be an effective way to remove the lens too.
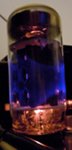
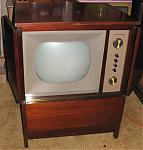
The major factor is, who makes the CRT? Zenith or RCA? If its an RCA (type of cateracts that looks like mold inside the lens) the heatgun method is by far your best bet. If its a zenith (green halo symptom) the bonding material is different, much more gel like. If the heat gun method is used on a zenith green halo tube, you will probably crack the lens from overheating. The "electric hot wire" technique is your best bet there. Assuming its an RCA, and by far the worst of all cateracts happens on RCA type tubes, I'll discuss the heatgun technique. As for supporting the CRT, I have a Cardboard barrel thats 18" in diameter and supports the tube very well. I put blankets around the edge of the barrel as added cusion to the CRT. RCA tubes will have a tape around the circumference of the lens, you will need to cut around that with a razor knife. The next step I use, is to preheat the CRT with a 500 watt halogen work light, aimed directly at the face of the tube about 6" away. After about 30 minutes or so, the lens is hot to the touch, thats what you want. Using a heatgun on the high setting, I start at the edges of the CRT and move the gun very slowly in one area at a time. Once the screen lens gets hot enough, it will begin to seperate from the PVA material. You will see little "fingers" of air pockets begin to form. Continue to move the heat around untill these air pocket fingers merge together. You might want to insert a wood wedge (very thin) into this area on the edge as a slight upward pressure on the lens will assist in the airpocket breaking open, thus seperating the lens from the crt. You must be extremely careful when putting the wedge in, just a very very slight amount of pressure is needed. Do not attempt to use the wedge as a tool to lift off the entire lens, or you might break the lens. As you heat more and more of the lens use your fingers to gently pull up on the lens so you can get a feel as to how much more heat it will take to separate it. You will notice that the air pocket fingers will begin to dissipate as you move away from a particular area you were just heating. Try to keep that pocket in there. Periodically, you will need to go back over the area you just heated to reform those air pockets. Once you get the lens hot enough, you should be able to gently pull lens off of the CRT, with the the PVA material ONLY ON THE FACE OF THE CRT. If the PVA comes off in strands that look like the air pocket fingers, you didnt get the lens hot enough before you removed it. Its very difficult and time consuming to remove the peices of stuck PVA to the crt lens as its concave. Now, assuming the PVA is only on the CRT face, quickly grab the edges of the PVA and pull up on it slightly. As its still hot, it should simply peel off the face very smoothly and easily. Of course there will be small bits and pieces here and there that wont come off. Use a razor blade and scrape it off the lens and or CRT. Once you get it scraped off thin enough, use gasoline on a rag to help dissolve the remaining film thats left on the crt. You will get it near perfect. After that, use windex or some other glass cleaner with newspaper as the rag to clean the rest of the glass. This will insure a clean, streak free surface. As for remonting the lens, the best way is to use double sided foam tape (by 3M) and put a few 1" long pieces around the circumference of the crt, being carefull not to place the tape too far in or you could see it when you remount the crt to the bezel. you must use the foam tape as a spacer/cushion. If you do not do this, the center of the lens will touch the center of the CRT, leaving about a 1/16" gap on the edges. If this is left unattended, remounting of the CRT will compress the lens creating undue stress to the glass. Some have questioned wheter the PVA or lens spacing effect picture quality and or focus. the answer is NO, not at all. The PVA is clear and will not effect the appearance of the tube either. After centering the lens on the CRT, seal the circumference of the tube using clear packaging tape. This will prevent dust and debris from entering the space between the lens and CRT. Remount the CRT exactly as it came out of the cabinet. You might need to adjust the CRT mounting hardware to compensate for the fact that the distance from the edge of the CRT lens contact point to the mounting bracket might have changed. This is because the orignal PVA material set the "gap". The foam is slightly thiner than the original thickness of the PVA at the edges of the CRT. Once your reinstalled, the picture will be perfect as new and look great. You'll never have to worry about cateracts again. Here are some pictures of a 1965 RCA roundie that I did cateract repair on. Last edited by drh4683; 10-16-2006 at 02:45 PM.
|
|
#3
10-15-2006, 01:54 PM
|
||||
|
||||
|
Here are some actuall cateract removal pictures of a 1968 magnavox color TV. I did the work on this one back in '03. These pictures show the detail as to what the PVA looks like. Just to note, see the center of the CRT? Notice the airpockets impression that is still on the PVA. This is because I didnt get the lens hot enough in the center before I pulled it off. The second to last picture is the final finished CRT.
The last picture is the final insallation of the newly repaired CRT, looks as good as it did when new. Last edited by drh4683; 10-15-2006 at 01:56 PM.
|
|
#4
10-15-2006, 02:05 PM
|
||||
|
||||
|
That is a GREAT article!!!!!!!!!!!!!!!!!! This needs to be posted as sticky at the head of the early color TV column.
Quote:
 I might only add that when I did mine, I did NOT get it hot enough, and I did crack the lens. No loss for me though, because I wanted it to go in a CTC-9 with external glass anyway. The hardest part, in my experience (one experience only to date), is that those "fingers" of air go away fast! The whole project took me about an hour steady. I had not used the halogen lamp preheat, so I'll do that next time. I have a 1 Kw halogen dual-head lamp, so I bet that'll be even better. AND A SAFETY NOTE  ABSOLUTELY, POSITIVELY, USE SAFETY GLASSES AND FACE PROTECTION! I WORE A FULL-FACE MOTORCYCLE HELMET, MOTOCROSS CHEST PROTECTOR AND NECK WRAP. I KNOW IT SOUNDS NERDISH, BUT BELIEVE ME IF THAT TUBE FAILS WITH THE GLASS NOT ATTACHED, THERE WILL BE SHARDS OF GLASS THE SIZE OF SAMURAI SWORDS HITTING YOU IN THE FACE, FRONT OF BODY AND THROAT. ABSOLUTELY, POSITIVELY, USE SAFETY GLASSES AND FACE PROTECTION! I WORE A FULL-FACE MOTORCYCLE HELMET, MOTOCROSS CHEST PROTECTOR AND NECK WRAP. I KNOW IT SOUNDS NERDISH, BUT BELIEVE ME IF THAT TUBE FAILS WITH THE GLASS NOT ATTACHED, THERE WILL BE SHARDS OF GLASS THE SIZE OF SAMURAI SWORDS HITTING YOU IN THE FACE, FRONT OF BODY AND THROAT.There must have been some kind of official tool for this purpose, and there were CRT rebuilders all over the place. I can think of a half dozen in the West Los Angeles area. Some of them were just one oven and lathe in the back of a regular TV repair shop (such as West Coast TV repair on Sepulveda Bl in Culver City). So we should all keep an eye for articles, and for any stuff like that on eBay. Charles
__________________
Collecting & restoring TVs in Los Angeles since age 10
|
|
#5
10-15-2006, 02:41 PM
|
||||
|
||||
|
The CRT rebuilders put the CRT in the oven and heated it to a high temperature (I don't know how high). When hot enough, the safety glass separates.
__________________
John Folsom
|
| Audiokarma |
|
#7
10-16-2006, 12:56 PM
|
||||
|
||||
|
I think those are excellent instructions. I stayed very close to this method. Instead of double sided tape I used a bead of automotive RTV clear sealant at the perimeter with small pieces of popsicle stick as spacers. I think the tape sounds better, and I'll try it should I do another. I would use black or clear tape; some is white and I think that would be more likely to show up once the crt is mounted. Just take your time, make sure both pieces of glass are extra clean prior to remounting.
__________________
Bryan
|
|
#8
10-16-2006, 04:54 PM
|
||||
|
||||
|
RCA roundie cateracts repair
This thread was perfect timing, as the combo I just got off ebay needed cateract removal work. I took many photos of the process. Like they say, a picture is worth one thousand words. The steps I described up above are in direct relation to what I have pictured, in that same order.
The cateract removal on this CRT went just fine and very fast. Once I applied the heat gun to the preheated lens, it took no more than 15 minutes to seperate! I finally took detailed pictures this time. Most of the time, I get too involved in the project and do not want to stop to take photos. I made sure I changed that this time as to help benifit others. Enjoy the photos.
|
|
#10
08-13-2007, 10:58 AM
|
||||
|
||||
|
Sorry to bump an old thread, but has anyone thought about removing the tape from the side of the tube and leave it to soak in some kind of solvent for a few days, untill the safety glass just falls off? A friend of mine used this method for a zenith CRT with the green halo with great results. I believe he just used kerosene.
__________________
This device isn't a spaceship, it's a time machine. It goes backwards, and forwards... it takes us to a place where we ache to go again.
|
| Audiokarma |
|
#11
08-13-2007, 11:58 AM
|
||||
|
||||
|
Very timely, fsjonsey! I have wondered for quite awhile about a different method-not kerosene but water. I know that crts which have been exposed to the weather will have the PVA turn to jelly. The question is, how long does it take? I finally, just this past weekend, started an experiment to find out. I was going to wait before posting but I'll show what I have done so far. First problem was having a basin big enough for the tube to sit in. If I was single-or if I wanted to be single again!-I would do this in the bathtub. That is not happening! Then I got to thinking. I went to Dollar General and they had a clearance on their summer merchandise. I bought this little 4' blow up swimming pool for $3.75. For the experiment I chose this 25GP22 Zenith I had in the attic. It has the tough "yellow" pva that only responds to a hotwire. I removed the tape, placed the crt facedown in the pool, and added a few inches of water. I later covered the pins & ultor connection to keep any rain out. I will check progress daily with photos to be posted, assuming this all works out. After sitting overnight the pva at the very edges has started turning white instead of the yellow/green cast it had to begin with.
One note: the last picture shows detail of something that has been discussed before. There is a rubber cork of sorts in the tape. It seems obvious that they DID pour the pva in through that opening.
__________________
Bryan
|
|
#12
08-13-2007, 12:37 PM
|
||||
|
||||
|
I await the outcome of your experiment anxiously
 I hate doing the heat gun method. I've done it twice, and I have 2 more sets that need to be done. Has anyone tried a piece of piano wire with wood dowel handles (cold; not electrified?) It works with modeling clay. Charles
__________________
Collecting & restoring TVs in Los Angeles since age 10
|
|
#14
08-13-2007, 01:16 PM
|
||||
|
||||
|
Quote:
__________________
This device isn't a spaceship, it's a time machine. It goes backwards, and forwards... it takes us to a place where we ache to go again.
|
|
#15
08-13-2007, 01:20 PM
|
||||
|
||||
|
Someone should do a test of common household solvents and their effects on the different types pf PVA bonding material used on the RCA and Zenith tubes. I was thinking acetone, gasoline, kerosene, denatured alcohol, paint thinner, and water, the universal solvent. Take lumps of the PVA removed from a tube via the heat gun method, cut them into equal size pieces, and see how long they take to dissolve in a cup of each of the solvents.
__________________
This device isn't a spaceship, it's a time machine. It goes backwards, and forwards... it takes us to a place where we ache to go again.
|
| Audiokarma |
 |
| Thread Tools | |
| Display Modes | |
|
|


 Linear Mode

