
|
|
|
#1
 01-03-2012, 07:01 PM
|
||||
|
||||
|
RCA 621ts Restoration
One of my New Years resolutions was to post better threads of my restorations. I've used Bandersen as my inspiration. I have enjoyed so many of his threads here both as they happen and through searching archived topics. This will not be a quick project for me, I plan on taking my time with this one, posting a lot of pictures of progress, and being very deliberate. With that in mind here is my new project, The RCA 621ts.
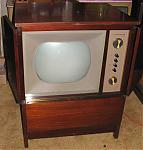
I found the set on ETF's classified pages and have been holding on to it for a few months. Now that the Holidays are over I decided that it's time to do some work on it. The cabinet is the walnut finish. I understand it is considered less desirable than the mahogany or blonde finish, although I've read that it was made in fewer numbers than the mahogany. 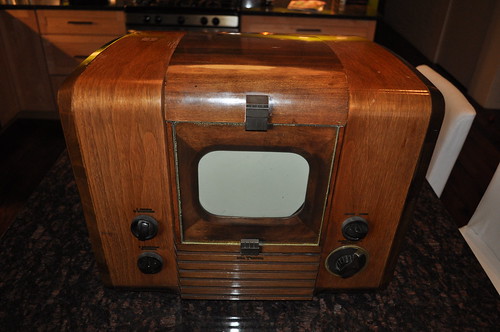 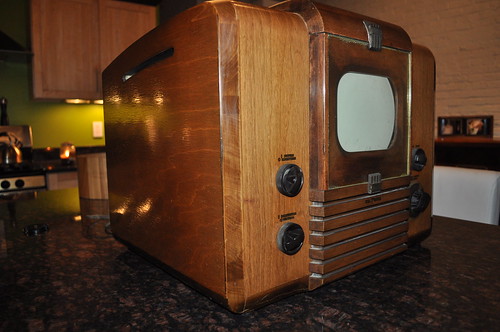  The cabinet is original but not without it's flaws. It photographs better than it looks. There is some crazing on the lacquer and a couple of bad spots. 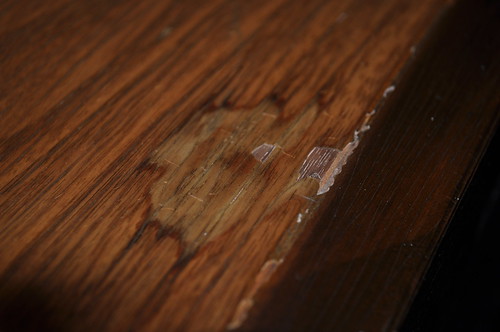 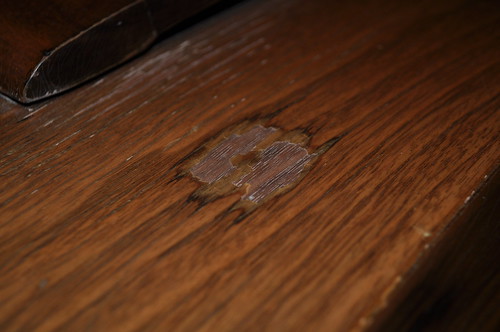  
Last edited by vts1134; 01-12-2012 at 08:28 PM. 
|
|
#2
01-03-2012, 07:20 PM
|
||||
|
||||
|
After disassembling the set I think that some of the cabinet problems are due to sun fading. You can see in the picture below that the wood that was blocked from sun is much darker than the rest of the front.
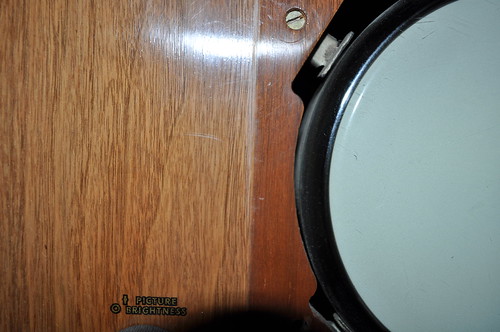 Some other observations of the the cabinet were that some the screws holding in the safety glass seem to be non-original. One original? 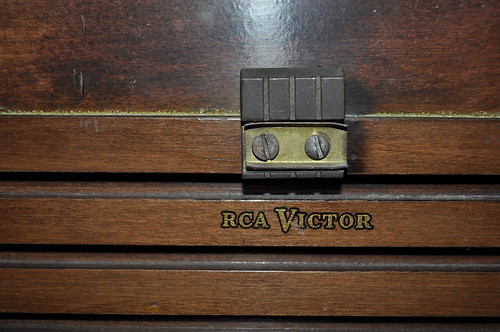 Both non-orignal? 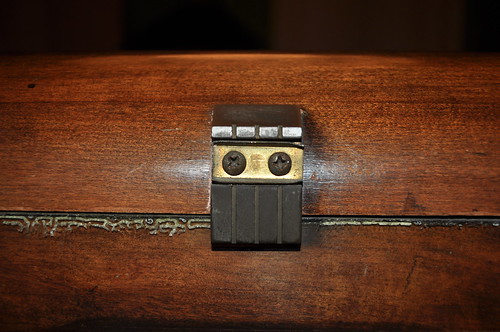 Also the safety glass itself is going to need to be replaced as it's flawed in between the two panes. 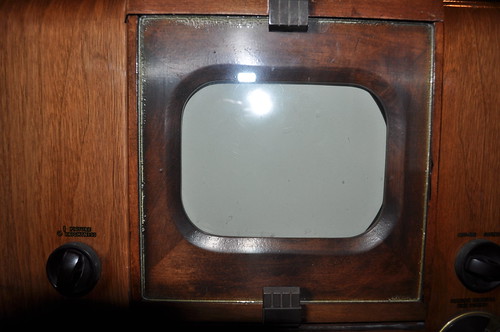
|
|
#4
01-03-2012, 08:54 PM
|
||||
|
||||
|
The Phillips screws are the correct ones for the retainers.
Something you might want to consider doing on this set is restuffing the old capacitors to keep it looking original. Here are a couple pictures of mine, before recapping and after, hard to tell the difference! I even replaced a green Solar brand cap from a later repair with one that matched the others.
|
|
#5
01-03-2012, 11:57 PM
|
||||
|
||||
|
I make a habbit of restuffing caps on sets that I either like alot or consider signifficant historically or as an example of something.
__________________
Tom C. Zenith: The quality stays in EVEN after the name falls off! What I want. --> http://www.videokarma.org/showpost.p...62&postcount=4
|
| Audiokarma |
|
#6
01-04-2012, 06:11 AM
|
||||
|
||||
|
I will be restuffing ALL capacitors as well as replacing any components that may have been added through servicing this set back to their original look.
Thanks for the info on the Phillips screws on the clips, I'll have to source two replacements for the bottom clip. Were the screws holding the back on the set also Phillips, and were they brass colored? Also thanks for the pictures of the bottom of the chassis, they will help in recognizing anything out of place on mine.
|
|
#7
01-04-2012, 07:16 AM
|
||||
|
||||
|
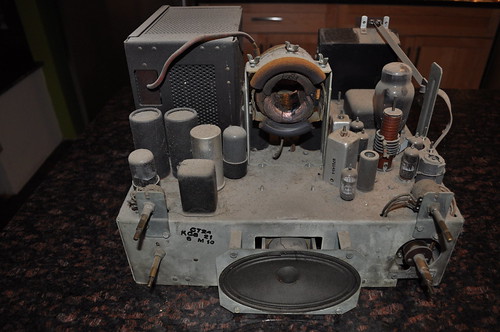
Great looking chassis. Word to the wise: cut a piece of heavy cardboard and cable-tie it over the speaker while you're working!
__________________
Reece Perfection is hard to reach with a screwdriver.
|
|
#8
01-04-2012, 10:24 AM
|
|||
|
|||
|
Quote:
|
|
#9
01-04-2012, 10:36 AM
|
||||
|
||||
|
That's a real nice set. I personally like the faded look; the walnut grain shows though bettter. I sure wouldn't refinish that cabinet, maybe touch those worn spots with a little Deft brushing lacquer.
|
|
#10
01-04-2012, 03:58 PM
|
||||
|
||||
|
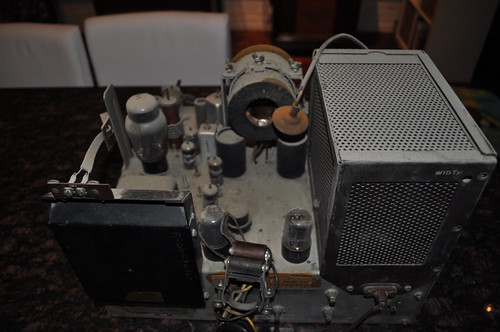
That is about as clean a chassis as one could hope for. Glad to hear you will be restuffing it. Keep us posted!
__________________
John Folsom
|
| Audiokarma |
|
#11
01-04-2012, 06:58 PM
|
||||
|
||||
|
Quote:
I was a bit short on capacitors to finish the set so I put in an order today for the replacements that I was missing. I didn't want to start work on the set and have to stop because I don't have all the capacitors. Once my caps come in I'll start restuffing and share my steps.
|
|
#12
01-04-2012, 07:01 PM
|
||||
|
||||
|
Quote:
|
|
#14
01-07-2012, 03:17 PM
|
||||
|
||||
|
A couple of updates.
The cabinet is now in the hands of the best wood finishing expert in the Pittsburgh area (or so I've been told by several trusting sources). He has been finishing wood for 58 years and has a small shop where he obsesses over his work in solitude. I had hoped to have the finished reamalgamated on the set but Lou thought the finish was too far gone for that method and that the crazing would return after only a few years. I know a few people here thought that the set shouldn't be refinished based on the pictures that I posted but the set photographed much better than it looked in person. I have ordered replacement decals from Radio Daze and will be applying them myself between the sealer and lacquer phases of the cabinet refinishing. One other bonus of refinishing is that the color will be able to be brought back to original, using the areas that were under cover as a reference. One question Lou had for me about the finish that I said I would answer later was the finish, should it be gloss, semi gloss, or something else possibly? What finish would the set have had from the factory? I would like to keep the set as close to what it would have looked like brand new. I have also dropped off the safety glass to a local glass shop to have them cut a new piece for me. I expect that to come back next week. On to the chassis. I have not done any component restoration yet, the electrolytics have not yet arrived so I've just been doing some further cleaning and polishing of the chassis. There were some non original decals on the rear of the set next to each control knob that were tough to remove. I tried scrubbing them off but I ended up having to sand them off in the end. 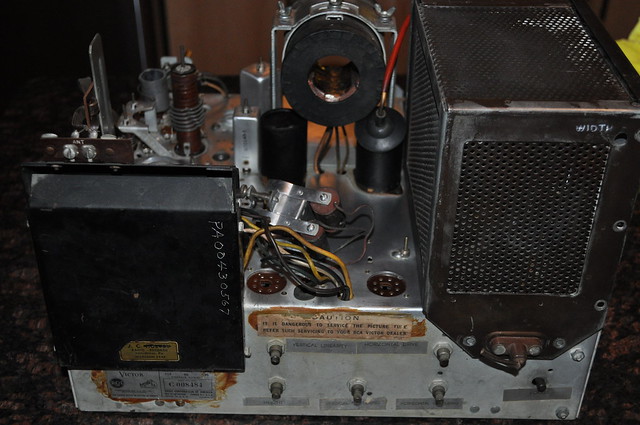  Looking at pictures of Tom Albrecht's 621 I think that the labels for the rear control knobs were ink printed directly on the back panel. If this turns out to be the case I'll have to make templates and screen print them on. Can any one post some higher res pictures of their back with the labels so that I can get a font, location, and size? Can some one also confirm what style and color the screws are for the back of the set?
|
|
#15
01-07-2012, 06:23 PM
|
||||
|
||||
|
I think it should be somewhat glossy, not mirror finish but a slightly reflective surface.
I think this picture of the unfaded area is about right. I think the whole top cover, grille and the edges are supposed to be dark like this area. Here's a picture of mine, note the shine on the curved edges and the dark trim, it's a Mahogany set though. 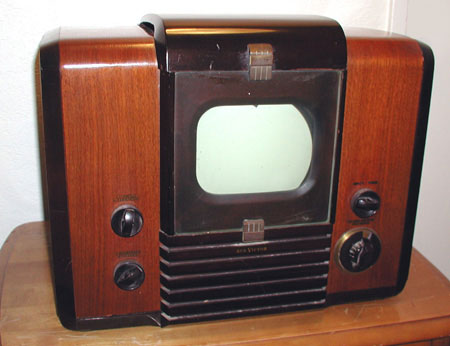
Last edited by Eric H; 01-07-2012 at 06:28 PM.
|
| Audiokarma |
 |
|
|


 Linear Mode

