
|
|
|
#76
 08-27-2017, 06:26 PM
|
||||
|
||||
|
Quote:
-Steve D.
__________________
Please visit my CT-100, CTC-5, vintage color tv site: http://www.wtv-zone.com/Stevetek/ 
|
|
#77
08-28-2017, 02:13 PM
|
||||
|
||||
|
Quote:
|
|
#78
08-29-2017, 12:30 AM
|
||||
|
||||
|
Quote:
|
|
#79
08-30-2017, 07:42 AM
|
||||
|
||||
|
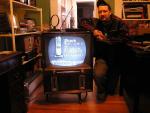
It's the same one, 17JC55 chassis from 1977. That white 1974 Zenith 19" solid state b/w next to it was part of the same guy's collection which wound up on ebay.
I've never figured out which remote it uses. The Zenith manuals I have say SC600. But I've never found an SC600Z mechanical remote where the frequencies are right (and I've tried the ones with the orange, white, and blue on/off button). I've used a SC1000 electronic remote with it, and then it works like it should (with 5 separate frequencies: on/off, vol, ch up, ch down, mute - not 4 like the SC600 mechanical remotes). But because this tv doesn't have zoom, and all the SC1000 remotes have the zoom button that one isn't right either. I've been wondering if there isn't some mysterious 5-button electronic remote without the zoom which Zenith made specifically for this model.
__________________
The quality goes in, before the cat goes on!! Last edited by Adam; 08-30-2017 at 07:49 AM.
|
|
#80
08-30-2017, 10:23 AM
|
||||
|
||||
|
Sounds like it uses a remote I've seen on eBay maybe twice but I can't remember if they had a zoom button. It's a shorter, wider electronic remote whose form factor was commonly used but these had a single volume button. Usually these remotes have volume lo/hi and channel lo/hi buttons side by side. As I recall the single volume button was in one of those rows of two.
Last edited by Jon A.; 08-30-2017 at 10:27 AM.
|
| Audiokarma |
|
#82
09-05-2017, 08:11 PM
|
||||
|
||||
|
The 2 mechanical remotes on the left (SC600Z) don't work with this set at all, none of the buttons do anything. (But I think there is a 3rd version with a blue on/off button I don't have).
The one on the far right was the first electronic remote Zenith started using in '77, called the SC1000. (I have a '79 19" table CCII with the zoom that uses that exact remote, and used to have a '77 23" CCII console that used it.) With that remote all the buttons do what they say, except for the zoom which this set doesn't have. Which makes me think that somewhere out there is one that looks like that without the zoom that belongs to my set. And because 5 of the buttons do something, I don't think it used a mechanical remote (which I've only seen with 4 buttons - unless they had something like they used to have with the older SC600s where you had to hit 2 buttons in sequence to adjust the tint). That shorter electronic remote, the SC800, I think is newer and went with the first System 3s. All the buttons on it do what they say with my set - except for the volume. The volume just seems to have 3 positions and one button will cycle through them (like on the remote on the far right). With this remote, the 'volume lo' button does that and the 'volume hi' button does nothing. The Zenith factory manual just says this set uses "SC600". I think that there might be a SC600 version of that SC1000 electronic remote with only 5 buttons that went with this set - but I have no definite proof that such a remote existed.
__________________
The quality goes in, before the cat goes on!! Last edited by Adam; 12-27-2017 at 01:43 PM.
|
|
#83
09-05-2017, 11:51 PM
|
||||
|
||||
|
Quote:
Here are the three different types of SC800 remotes from my stash; I don't think the tri-color logo was used on System 3 remotes, and I know I've seen a couple of examples with a single volume button. Please excuse the angle, I had to take it like that to keep the flash from washing out the details on the one in the middle.
|
|
#84
09-26-2017, 09:38 PM
|
||||
|
||||
|
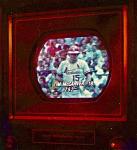
I've started a new tradition at our household... I have set up an area in the living room for one (or several small) set(s) to be displayed on a rotating basis. So far this has been used to display and "run in" of sets that have just "cleared the bench". Results have been very positive, most non-technical visitors show modest to high interest in these odd looking vintage sets.
The first sets to be exposed to "public display" were the two suitcase sets that I recently finished. 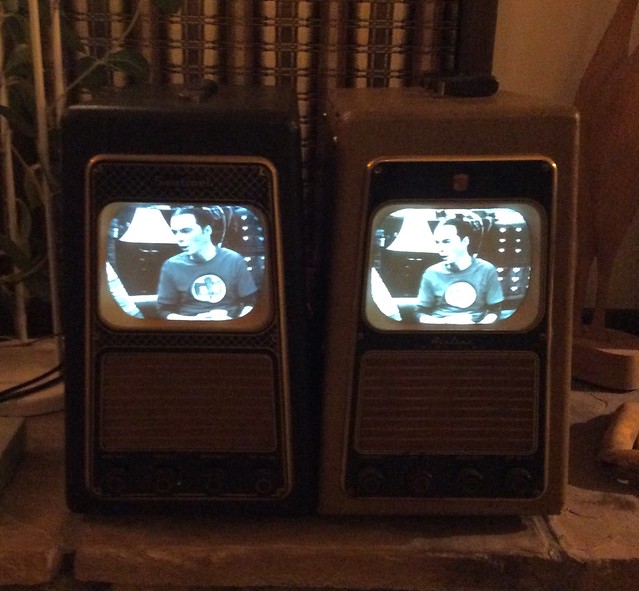 After several weeks they were rotated out and replaced with a GE 10T4 that just received a re-cap.  Today the Admiral 19A1 re-cap was finished, and it has "hit the hearth".  We are having great fun with this, and I must add that my wife is very supportive, the new tradition will continue. jr
|
|
#85
09-27-2017, 10:41 AM
|
||||
|
||||
|
Jr.
I continue to notice that many photos of displayed sets sacrifice the TV's themselves in order to show how bright the screen images are. Not singling you out, but your photos are typical of many submitted to this thread. I have brightened your suitcase sets as an example by brightening the photos up a bit. However if they were originally taken with proper lighting they would be much sharper in detail and contrast. I hope you and others take my comments as an observation and not as a criticism. -Steve D.
__________________
Please visit my CT-100, CTC-5, vintage color tv site: http://www.wtv-zone.com/Stevetek/ Last edited by Steve D.; 04-04-2018 at 04:24 PM.
|
| Audiokarma |
|
#86
09-27-2017, 05:06 PM
|
||||
|
||||
|
Thanks for the comments... I'm still experimenting, it is a fairly dark area of the living room (where the vintage sets look good to the eye). I actually had to turn the brightness down to avoid totally loosing the background... no 7JP4 was harmed to make the picture
 Ipad exposure was reportedly 1/15 of a second at asa 640, so there was some movment blurr and grain. Ipad exposure was reportedly 1/15 of a second at asa 640, so there was some movment blurr and grain.I just installed PS Express and will experiment with that a bit, hopefully it will help me produce a better balanced picture  jr
|
|
#87
09-28-2017, 01:45 AM
|
||||
|
||||
|
I’m really enjoying this thread and all the great displays. Congrats to all. Love seeing what others are doing and the sets.
As to Steve’s comment. It will be a compromise to display both a properly exposed screenshot while at the same time getting a properly exposed shot of the cabinet. Most folks do not possess high end cameras, and even so, it won’t be perfect. I have been taking screenshots since 1969, with a 35 mm Nikon analoqe film camera and now digital. If you are going for the best quality screenshot, the room needs to be darkened. If you want to see a properly exposed shot of the cabinet, the lit screen will be over exposed. I understand that folks want to see the television set displaying a nice screenshot. I try to compromise and show the set bright enough to desern details while still displaying a well exposed screenshot. It will never be perfect. If you want to show the best possible quality screenshot, you need to completely darken the room, fill the viewfinder completely with the television image, freeze the frame if possible, focus to the center of the screen and set your aperture. In this way, the camera sensors will be measuring only the light from the screen and not the room wich will compromise the quality of the screenshot. Last edited by etype2; 09-28-2017 at 02:22 AM.
|
|
#88
09-28-2017, 10:33 AM
|
||||
|
||||
|
There are a couple of ways to improve screen shots, but they require extra work, more than people may want to do for a progress report.
1) Take two separate shots, one of the picture with room lights off and one of the set with room lights on. Combine them (in Photoshop). This combo technique (by physically stripping in the screen) was used for decades in advertising when it was desired to state "actual TV image." 2) Take a single shot with the picture bright but not overexposed and the cabinet dim. In Photoshop, dodge and burn as needed, and also adjust the blacks in the picture to eliminate the fog of stray light.
|
 |
| Thread Tools | |
| Display Modes | |
|
|


 Personal website dedicated to Vintage Television


 Linear Mode

